- Home
- Computing
You can run macOS in a dedicated sandbox
When you buy a Mac, you’re paying for the hardware and software. This means you can access and use the latest macOS Sonoma for free. But what if you want to use macOS on non-Apple hardware, such as a Windows laptop? That’s possible, and virtualization is one of the most straightforward methods to do so. You can also rely on virtualization to install a separate copy of macOS in an isolated sandbox on your Mac for testing or other purposes. Here’s how to install macOS in VirtualBox.
Related
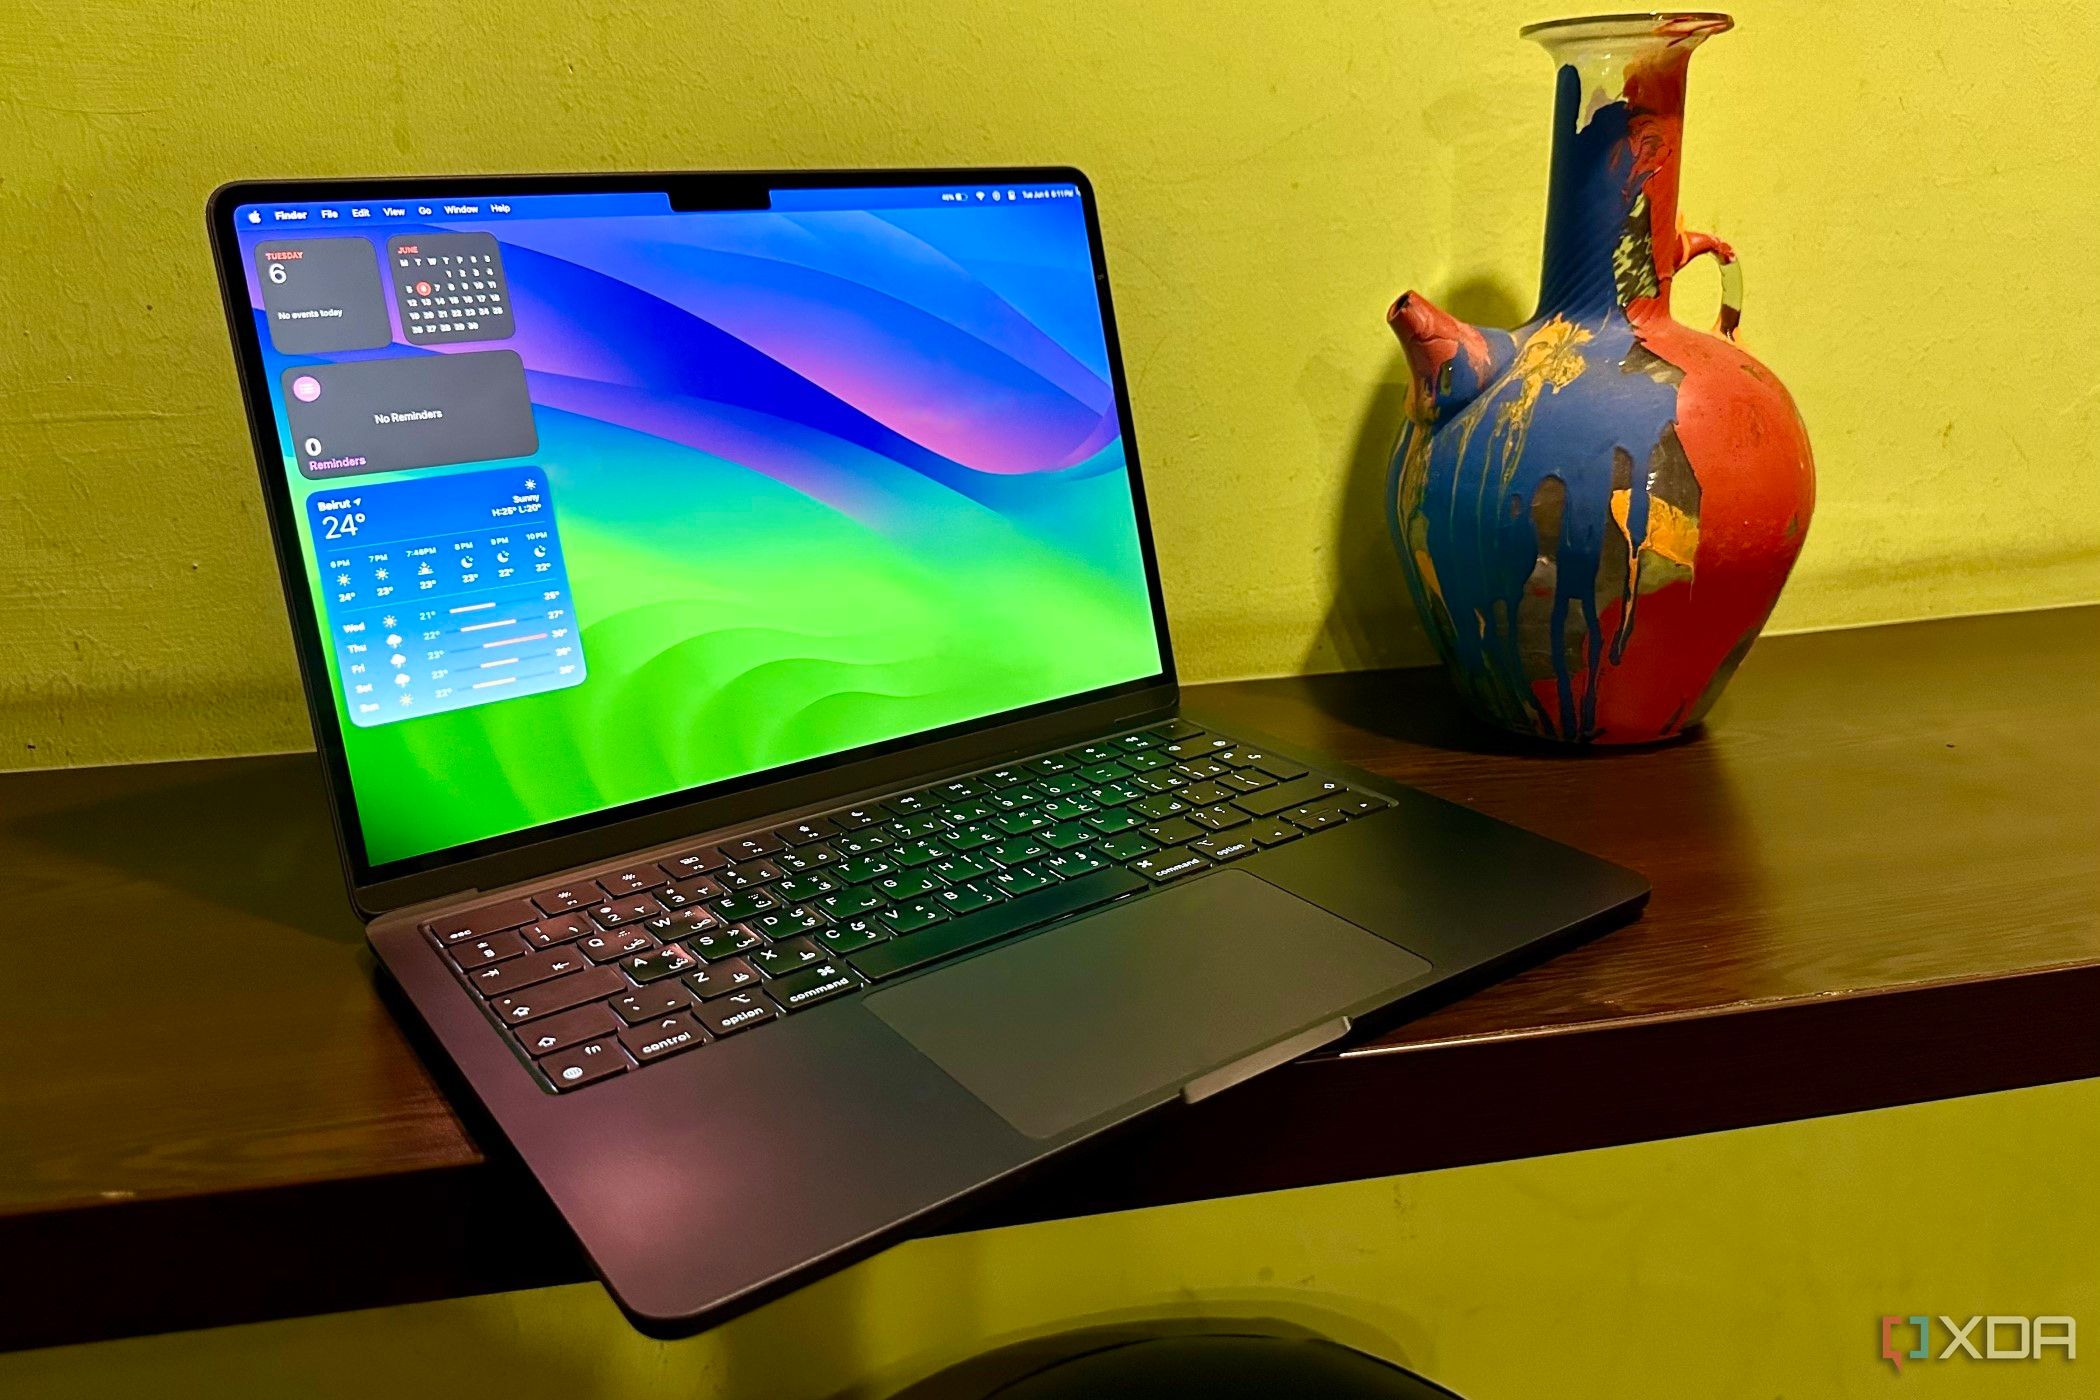
macOS Sonoma review: The most polished Mac experience yet
The latest macOS update introduces handy new features, along with some visual changes.
What’s VirtualBox?
VirtualBox is a full virtualizer available on macOS, Windows, and Linux. When you install an operating system in VirtualBox, you’re not dual-booting the new OS alongside the original one. Instead, you’re running the desired operating system in a sandbox powered by the original OS. Consequently, the OS running on the virtual machine will have fewer resources to use, and it typically is slower than the original one. If you’re not a fan of VirtualBox, other virtualization alternatives exist, such as VMWare.
Prerequisites for installing macOS in VirtualBox

To install macOS in VirtualBox, you will need the following:
- A computer with enough storage and processing power. macOS itself may consume over 20GB of space when installed.
- A compatible virtualization software. In this case, we will be opting for VirtualBox.
- The ISO file for macOS. More on this in the following section.
- A reliable internet connection.
How to get the ISO file for macOS
The ISO file for macOS is one of the primary requirements for running the OS in VirtualBox. The main package includes the ~14GB of resources needed to install macOS in the sandbox. This requires you to convert the APP file you download from the Mac App Store page to DMG, then from DMG to ISO. Starting with macOS Big Sur, Apple no longer offers the APP file on the web. This means that you will need a Mac to download this file from the App Store and then convert it to ISO.
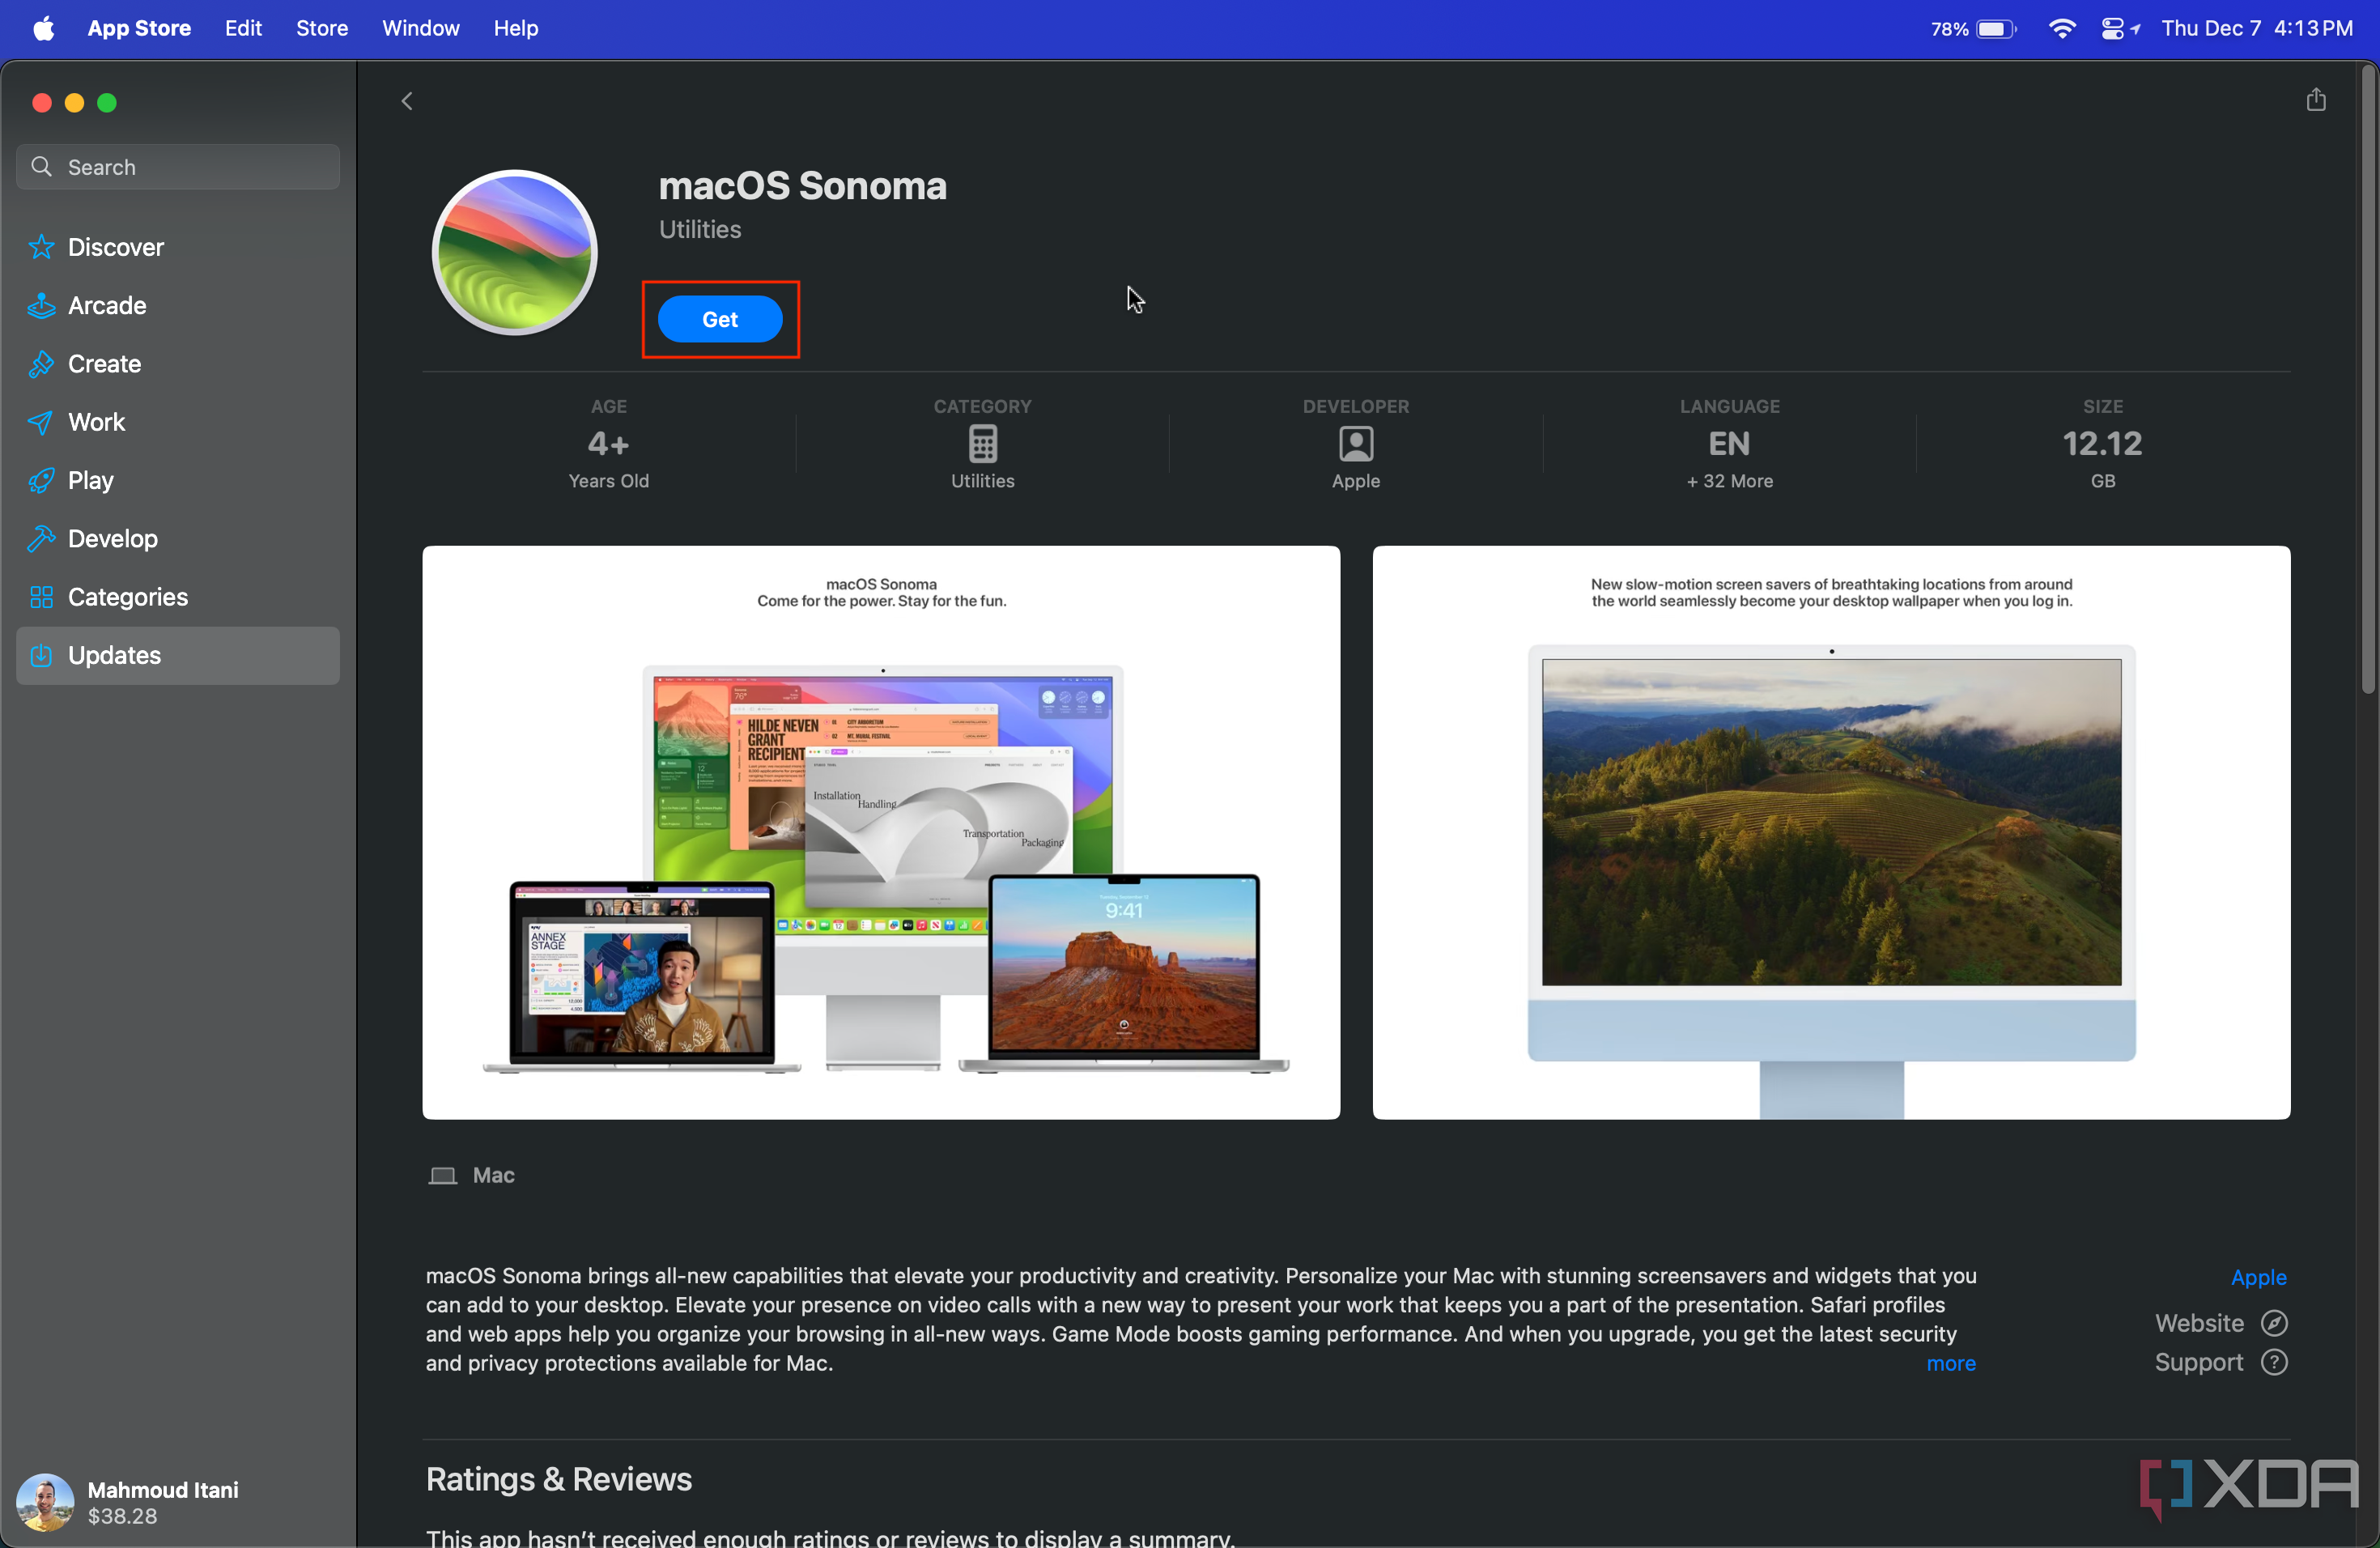
We understand that not everyone has access to a Mac, though. In this case, the ISO file can be obtained by looking it up online. Search the web for macOS Sonoma ISO file, and download it from a source you trust. The file size should be around 14GB. If you have a Mac and don’t want to download the ISO file from a random source, then you can obtain it by following the steps:
-
Navigate to the macOS Sonoma listing on your Mac’s App Store.
-
Hit the Get button, and wait for it to download. Do not install the OS on your Mac.
-
Once the download process concludes, launch the Terminal app on your Mac.
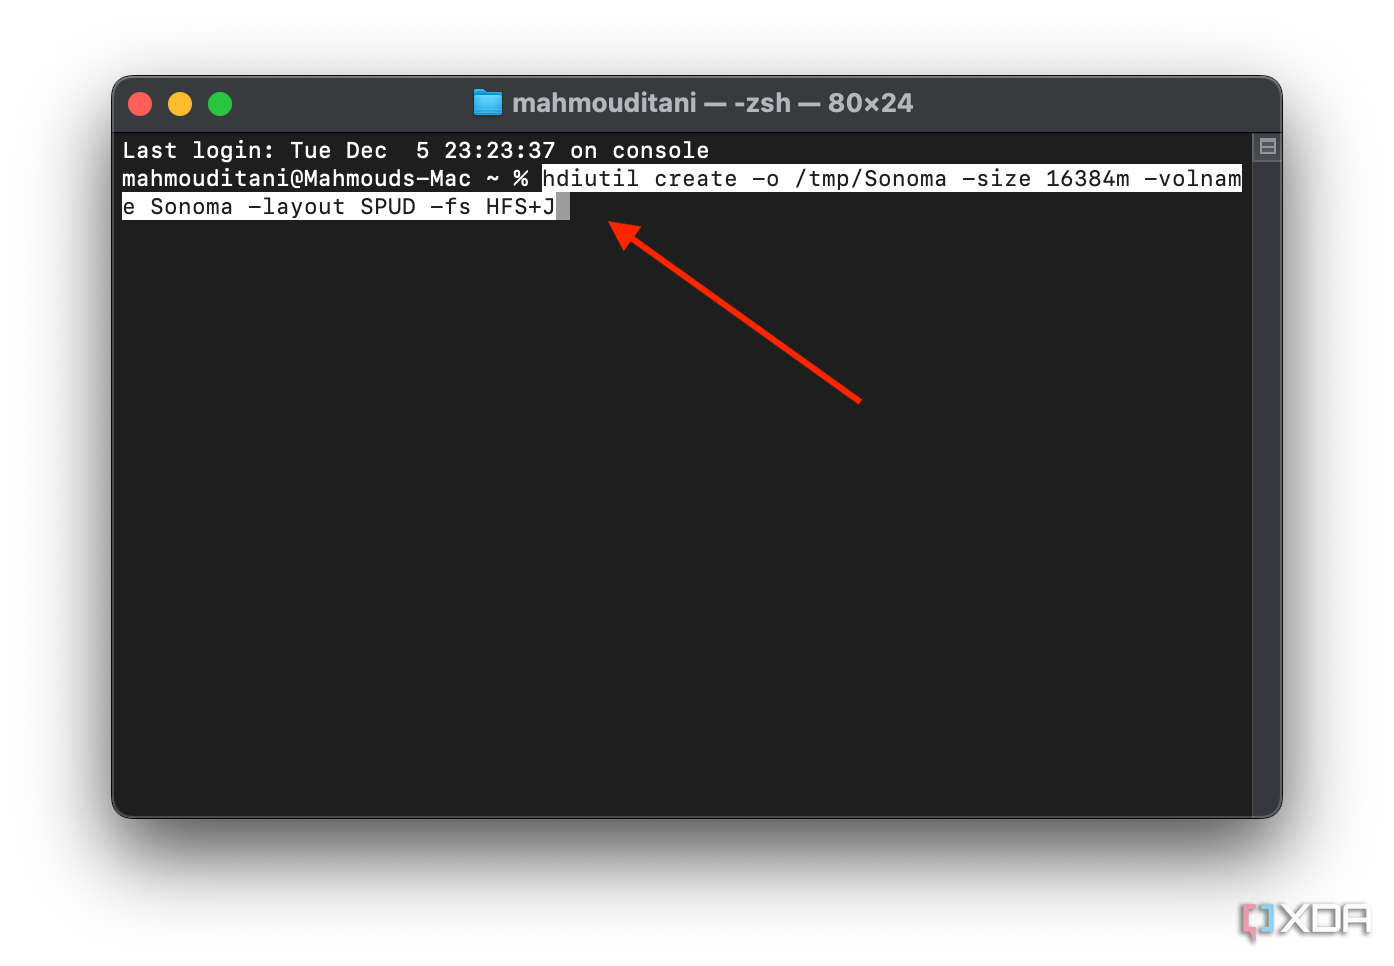
-
Paste hdiutil create -o /tmp/Sonoma -size 16384m -volname Sonoma -layout SPUD -fs HFS+J, and hit Return.
-
Paste hdiutil attach /tmp/Sonoma.dmg -noverify -mountpoint /Volumes/Sonoma, then hit Return.

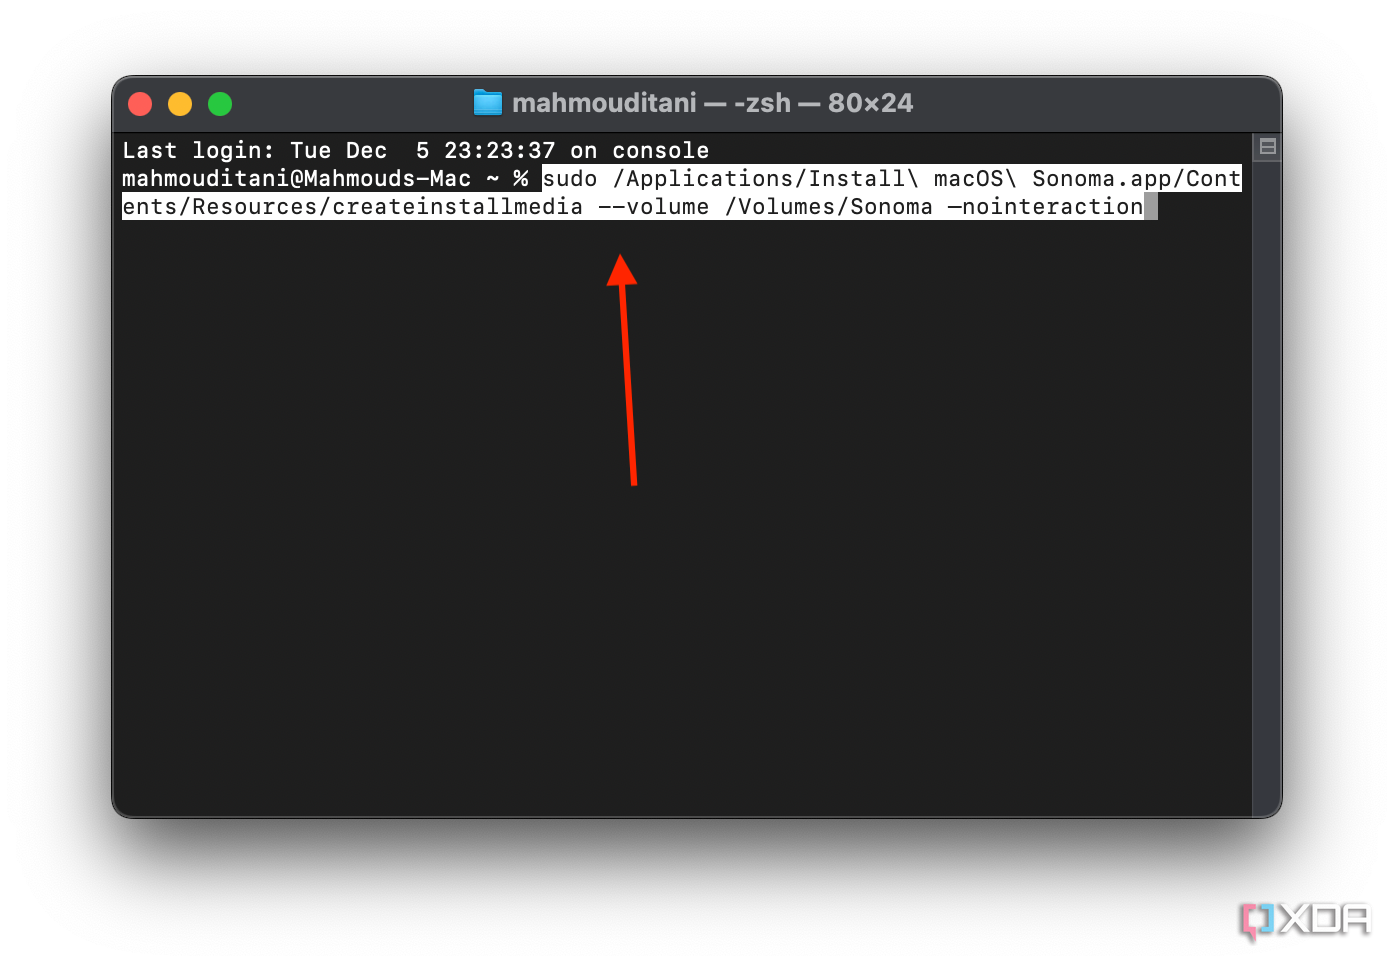
-
Paste sudo /Applications/Install\ macOS\ Sonoma.app/Contents/Resources/createinstallmedia —volume /Volumes/Sonoma –nointeraction, hit Return, and enter your Mac’s password when prompted. Note that your password won’t be visible in Terminal, not even as asterisks.
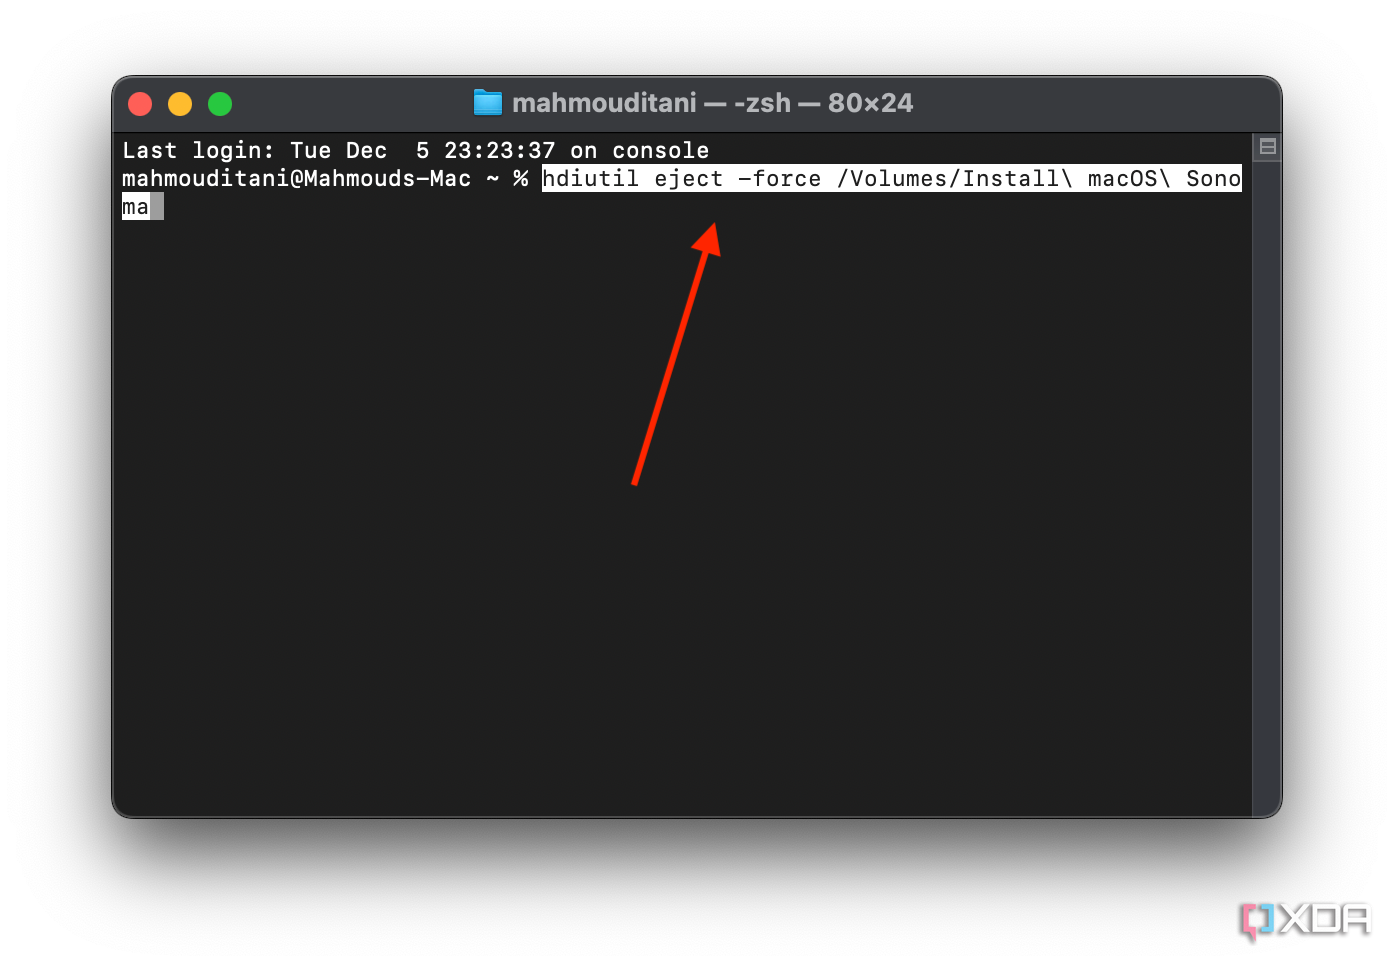
-
Paste hdiutil eject -force /Volumes/Install\ macOS\ Sonoma, then hit Return.
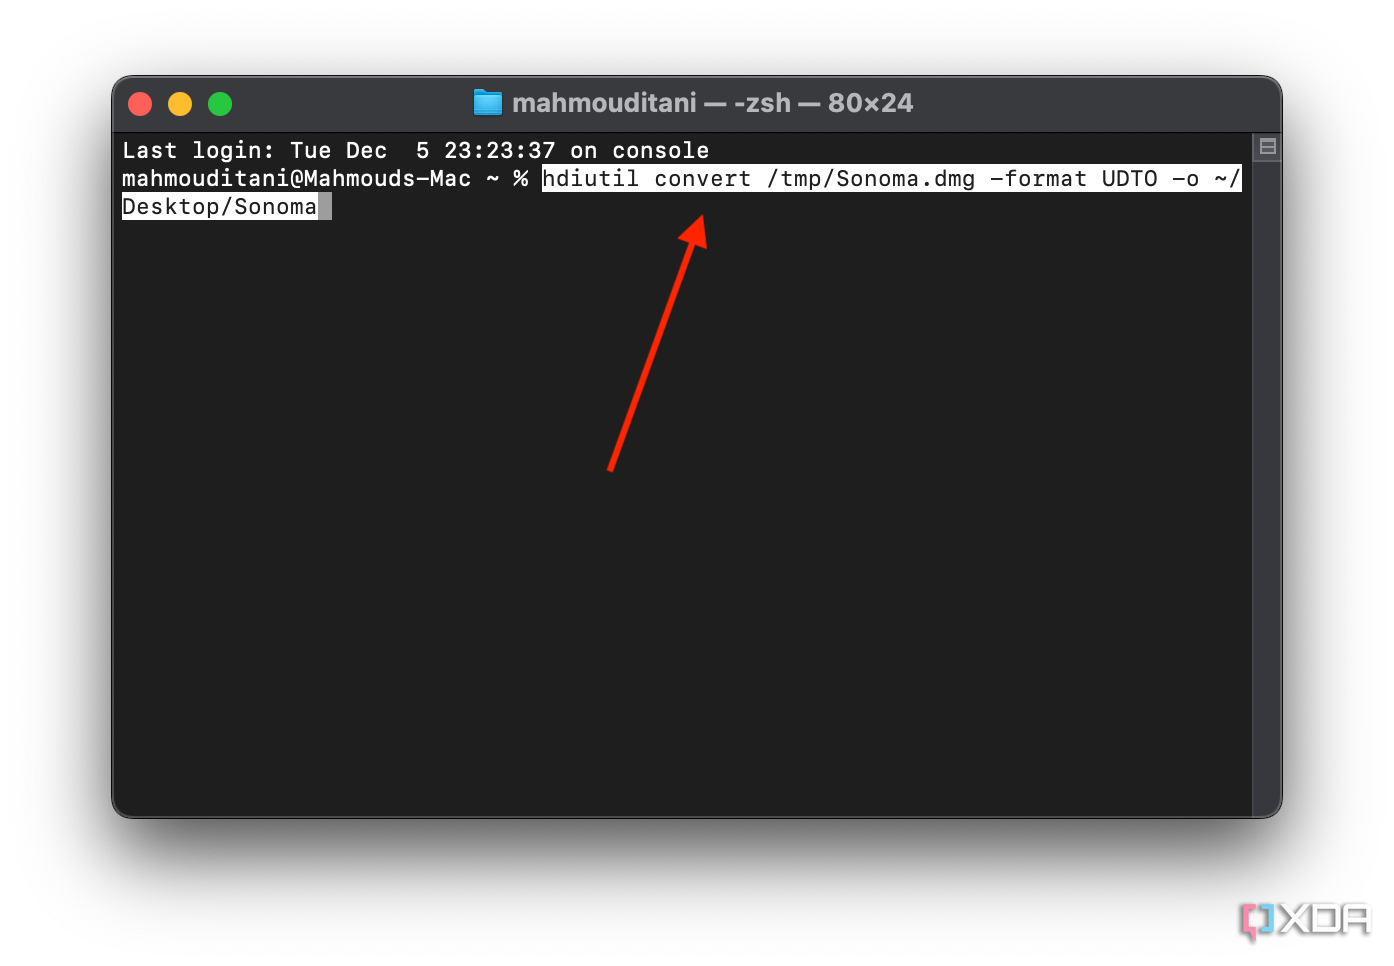
-
Paste hdiutil convert /tmp/Sonoma.dmg -format UDTO -o ~/Desktop/Sonoma, and hit Return.
-
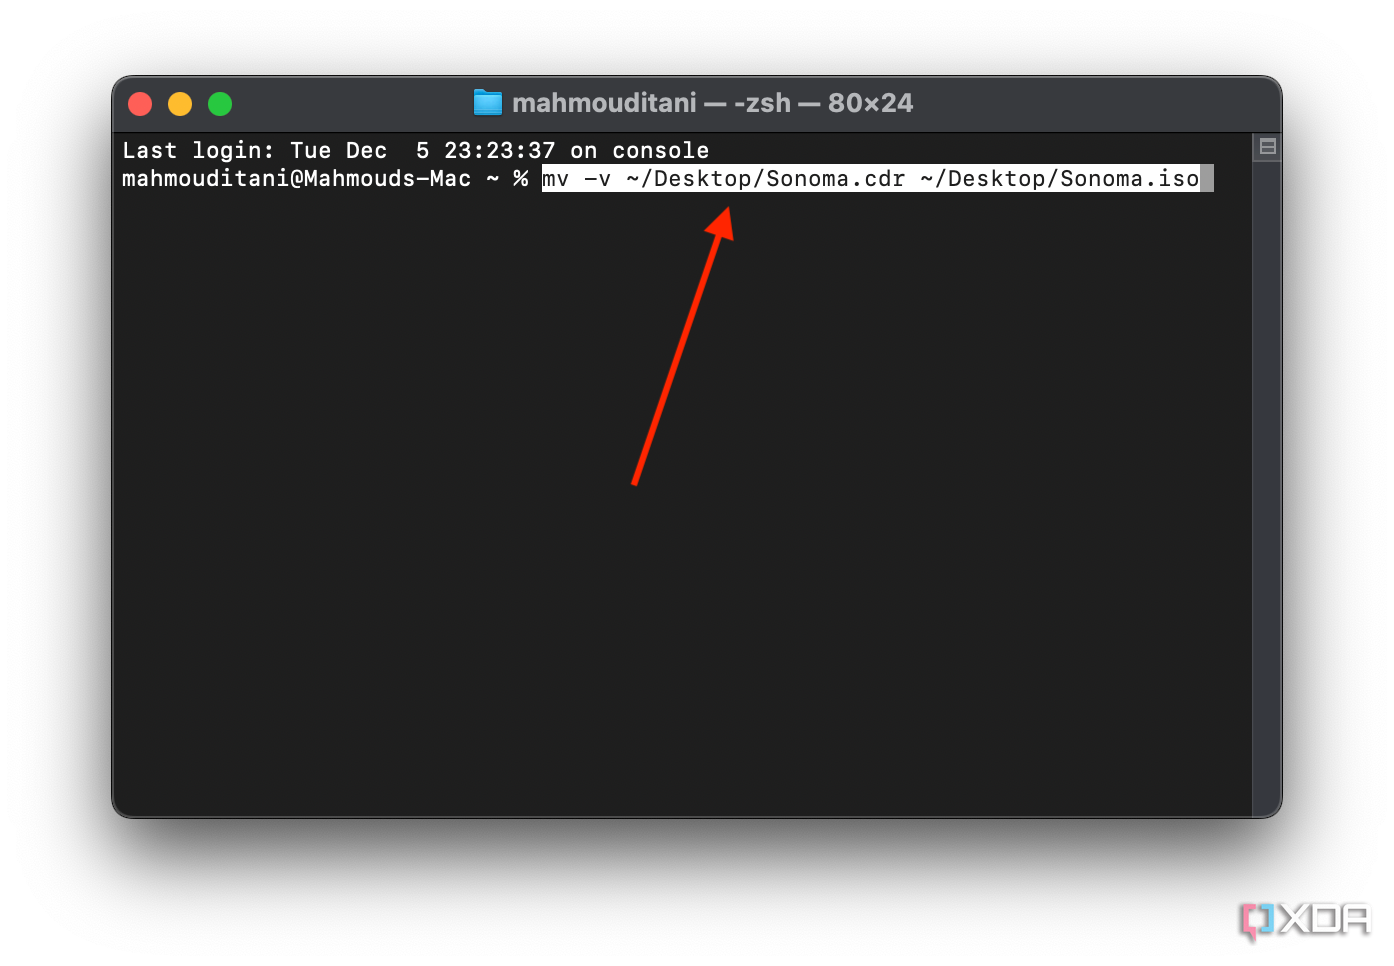
Finally, paste mv -v ~/Desktop/Sonoma.cdr ~/Desktop/Sonoma.iso, and hit Return. A file called Sonoma.ISO should appear on your Desktop.
-
To delete the DMG file that you no longer need, paste rm -fv /tmp/Sonoma.dmg, and hit Return.

- If you plan on running macOS in VirtualBox on a Windows or another Mac computer, move the newly created Sonoma.ISO file to the device of your choice. Otherwise, leave it on your Desktop.
How to install macOS in VirtualBox
Once you’ve obtained the ISO file through a third-party source or local conversion via Terminal, you can proceed to install macOS in VirtualBox by following these steps:
-
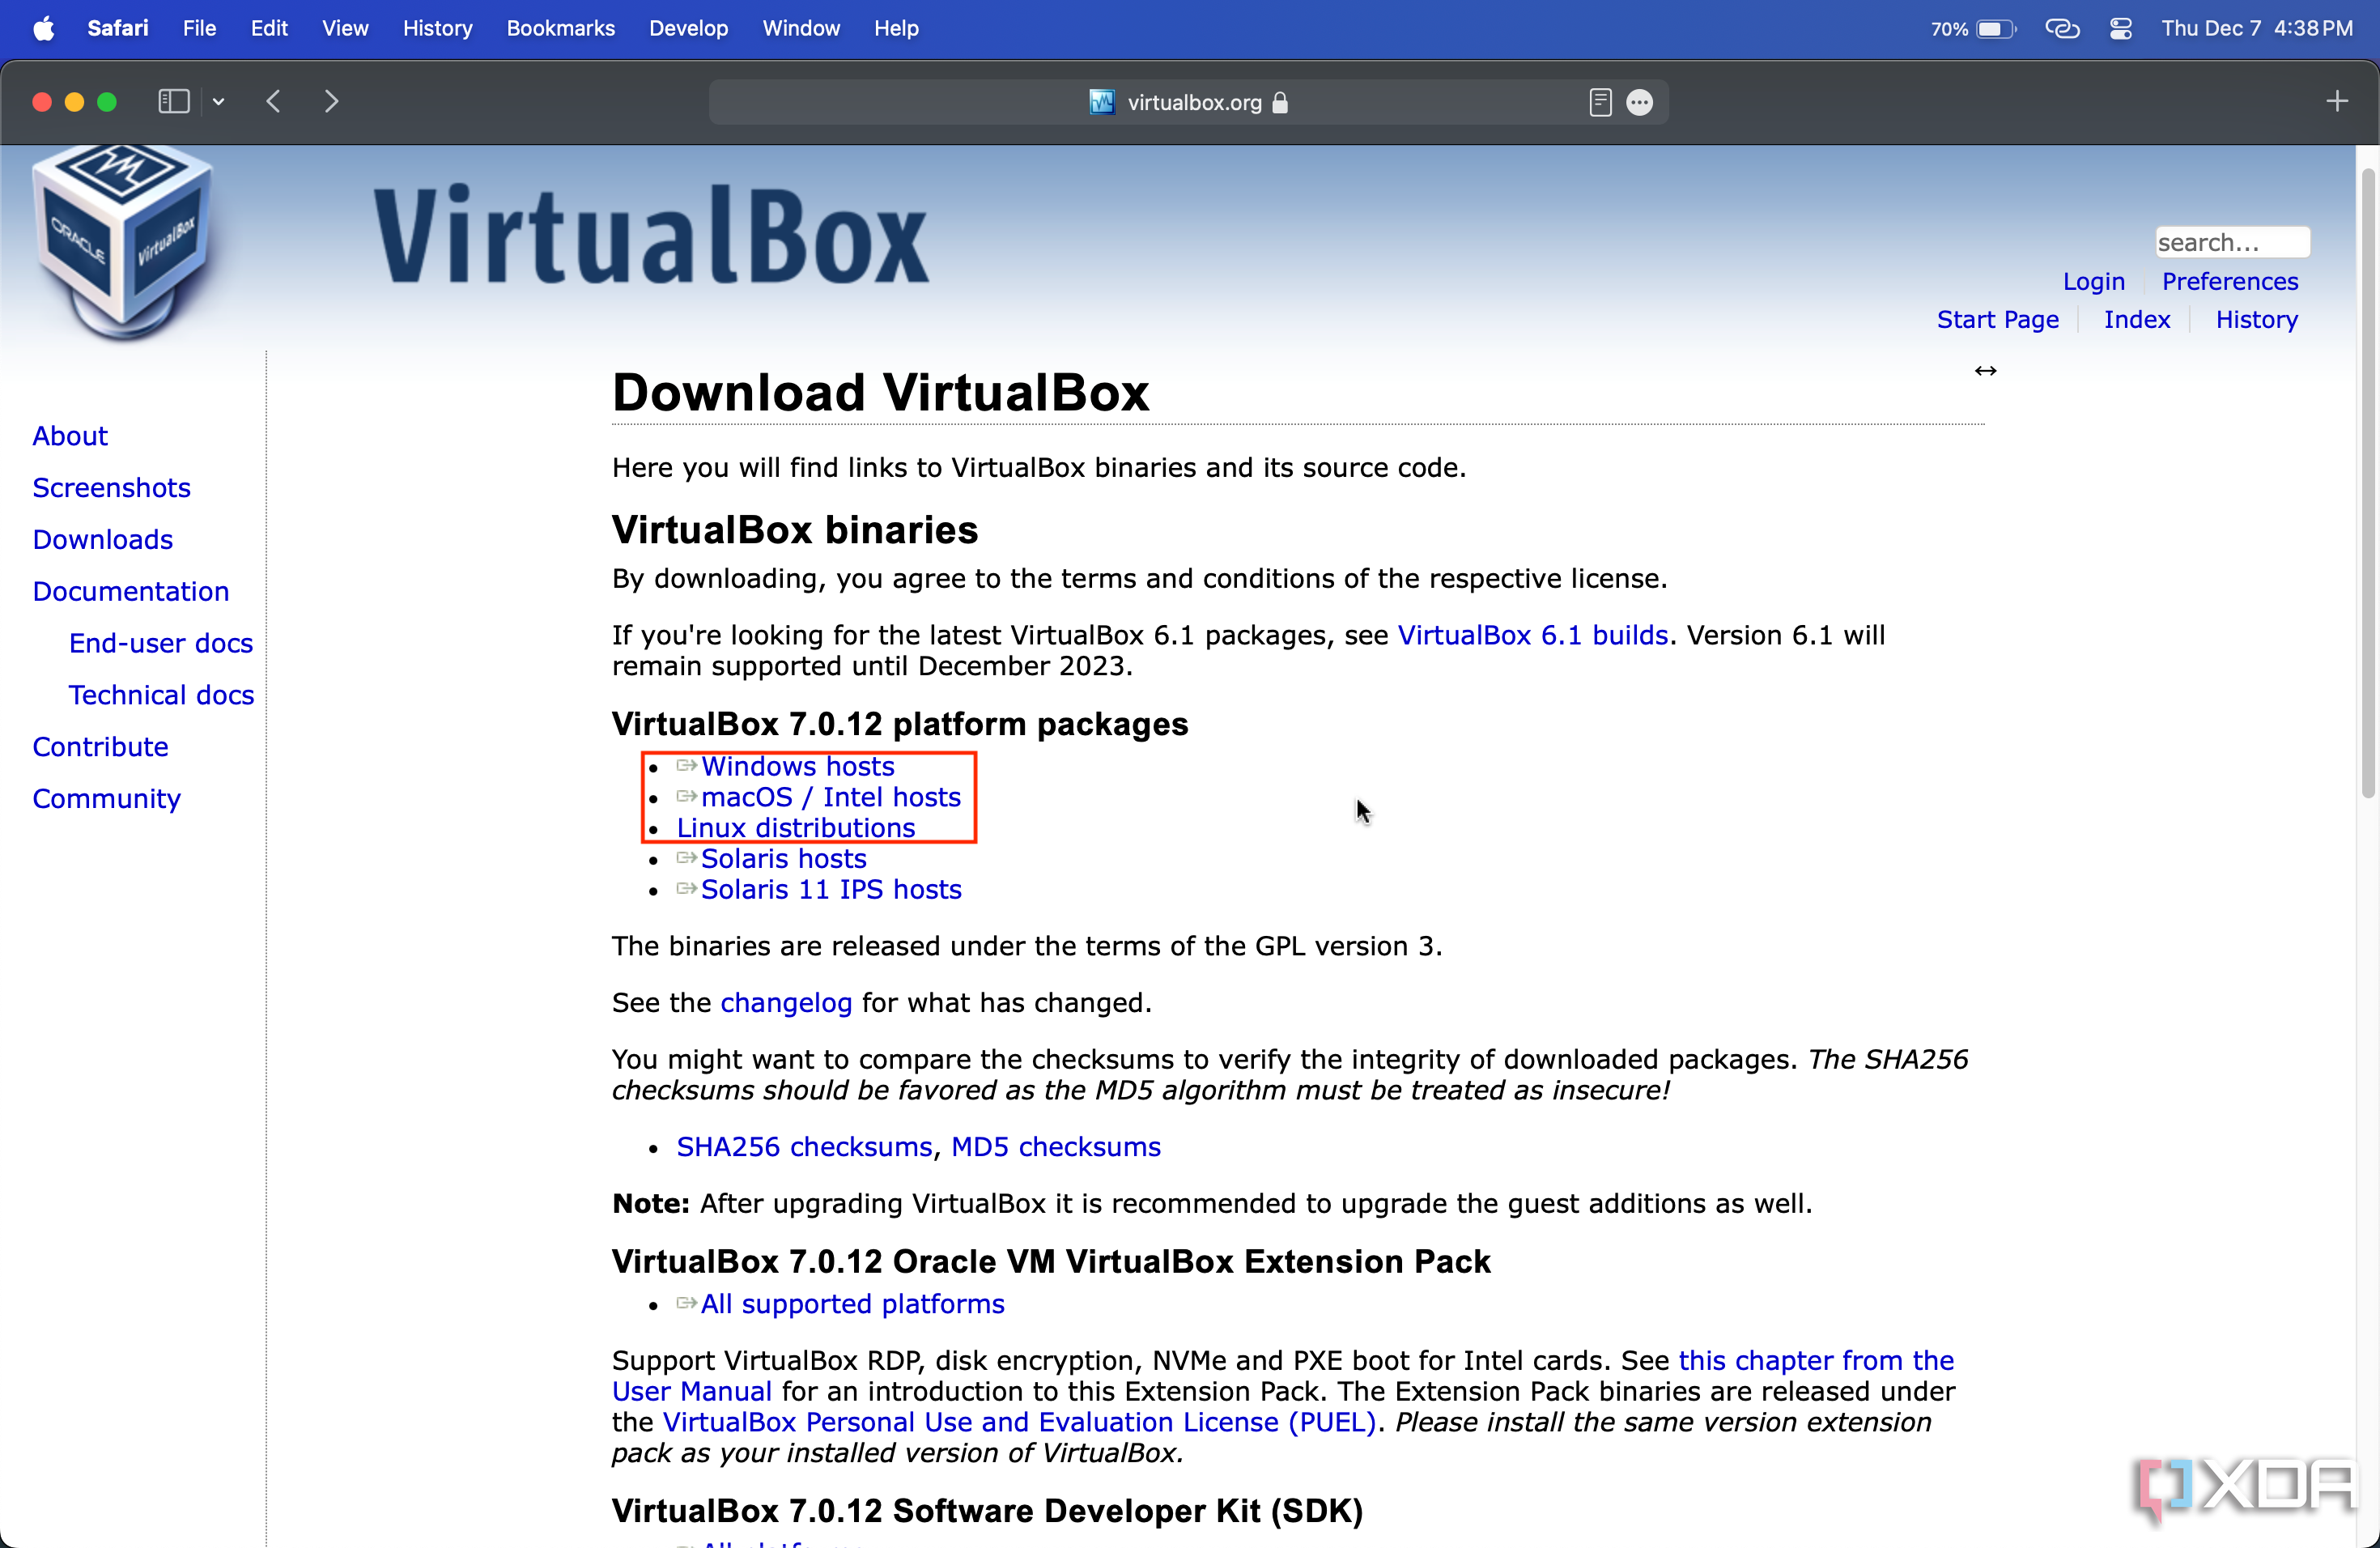
Download VirtualBox to your machine:
-
If you’re on macOS (Intel), Windows, or Linux, go to the VirtualBox downloads page and click the link that matches your computer’s operating system.
-
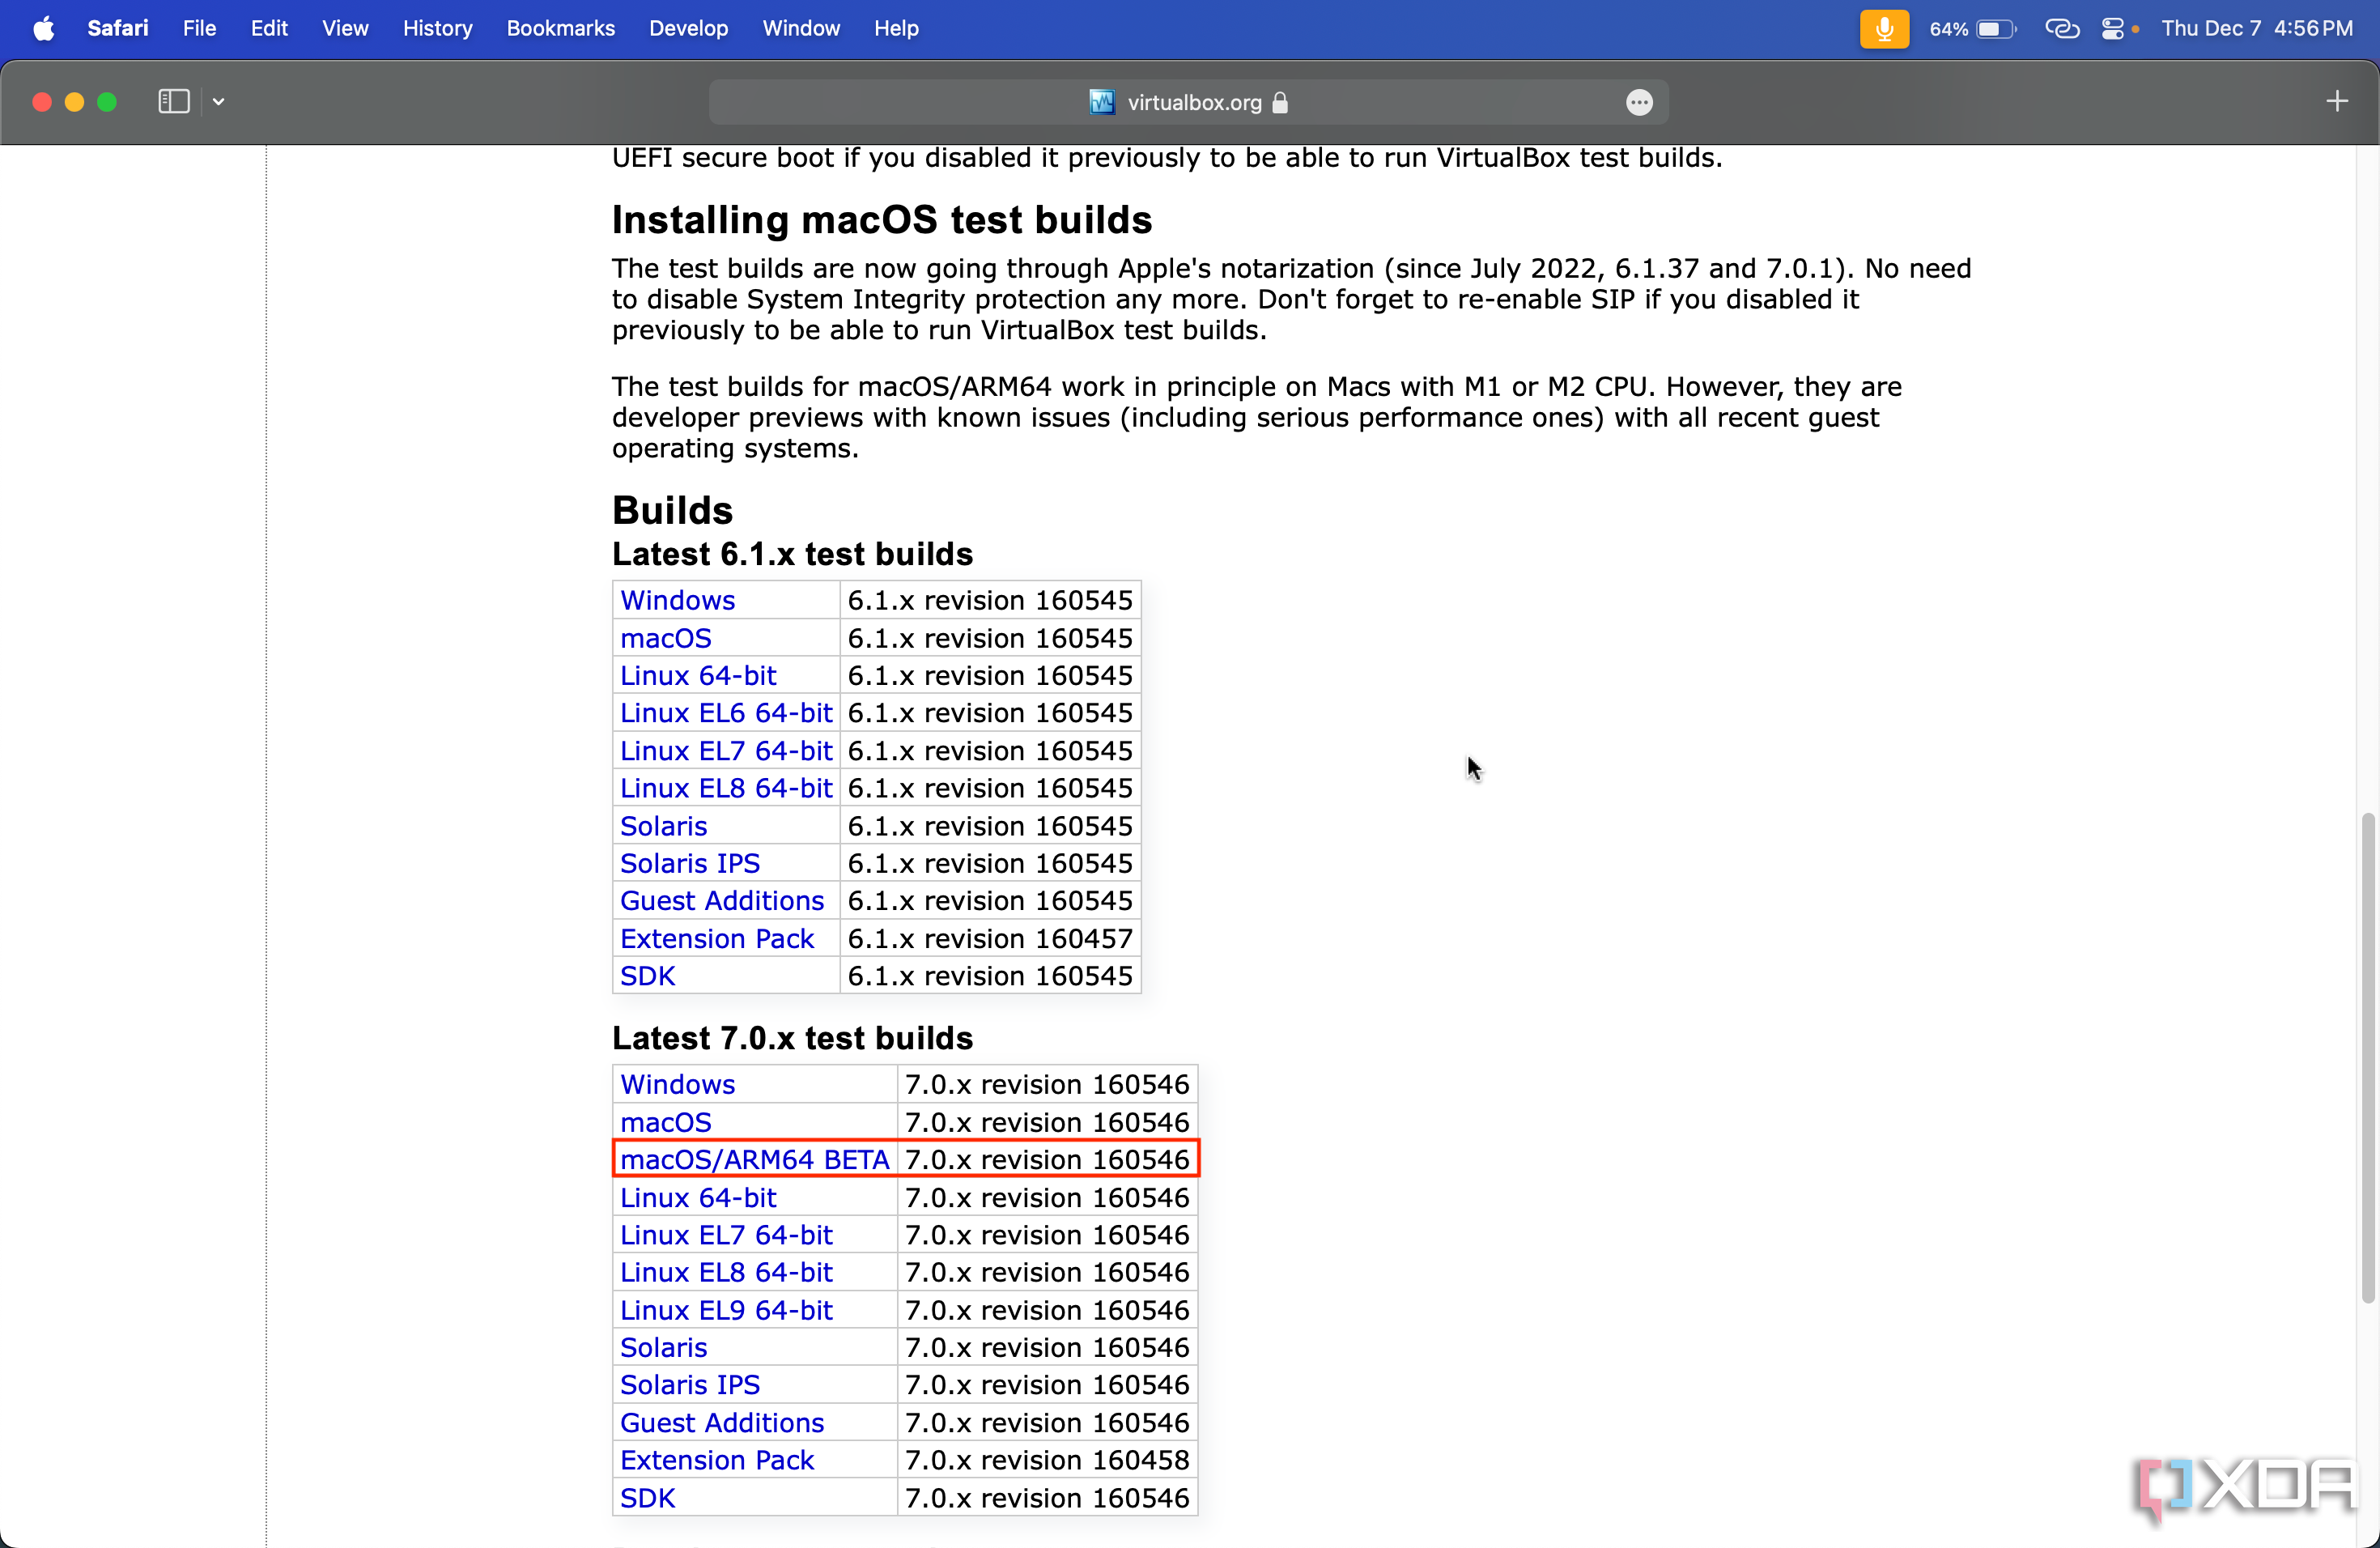
If you’re using an Apple silicon (M-powered) Mac, you’ll have to download the beta version, as the stable channel still doesn’t offer ARM support.
-
-
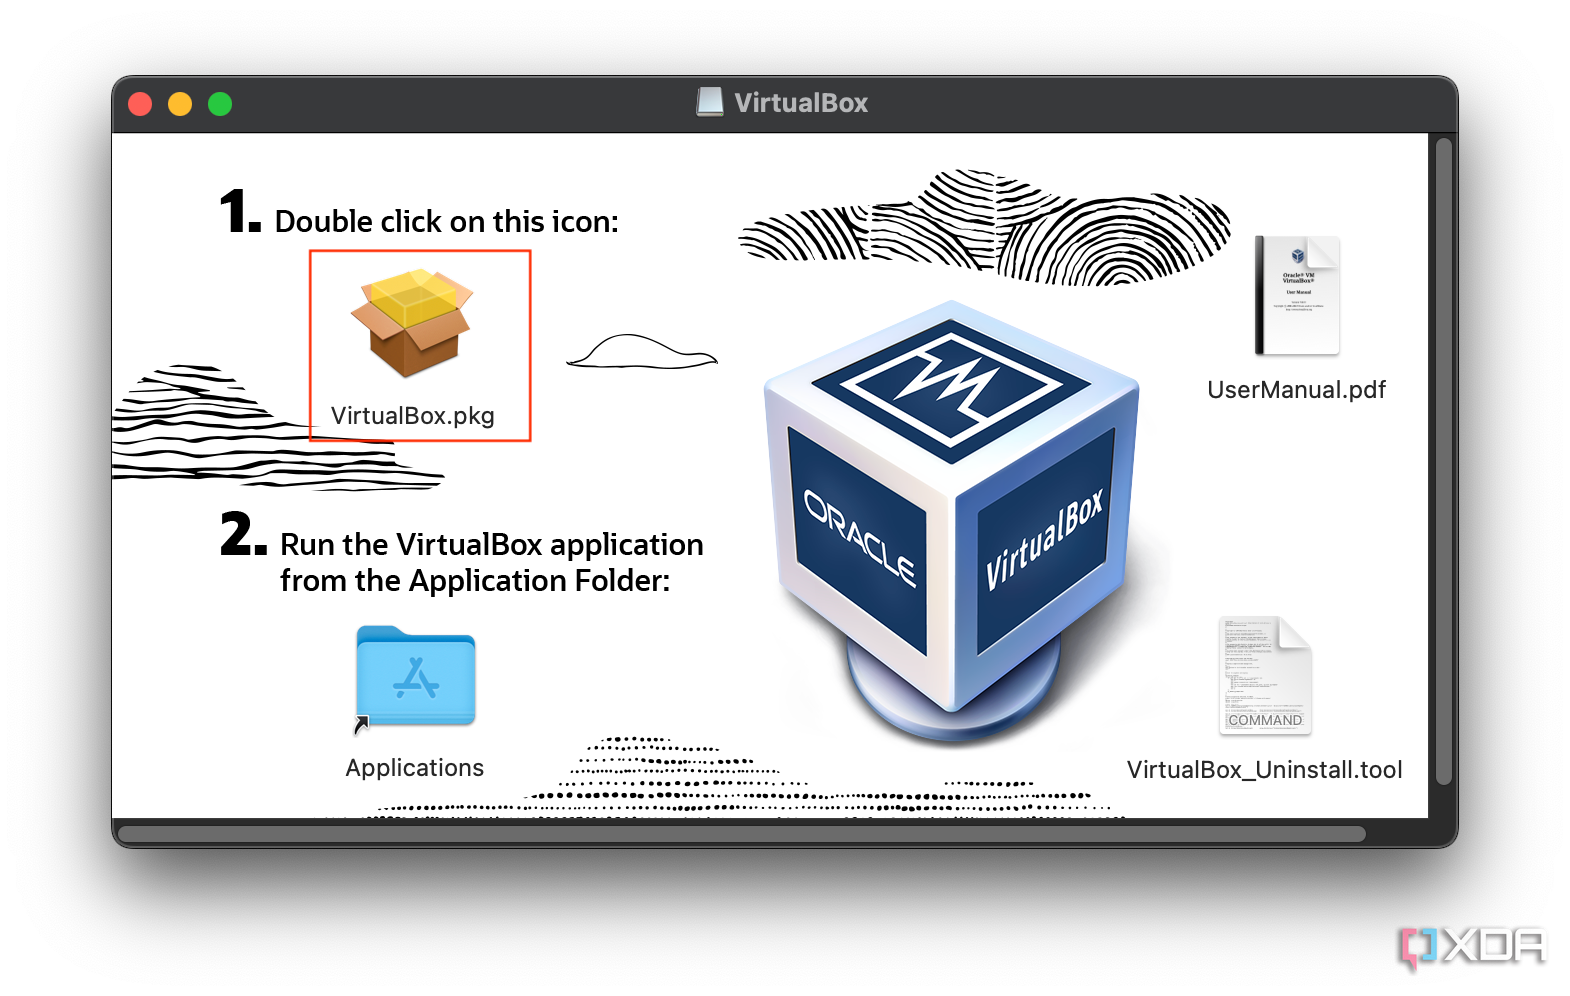
Once the download process concludes, install VirtualBox on your machine by following the on-screen instructions.
-
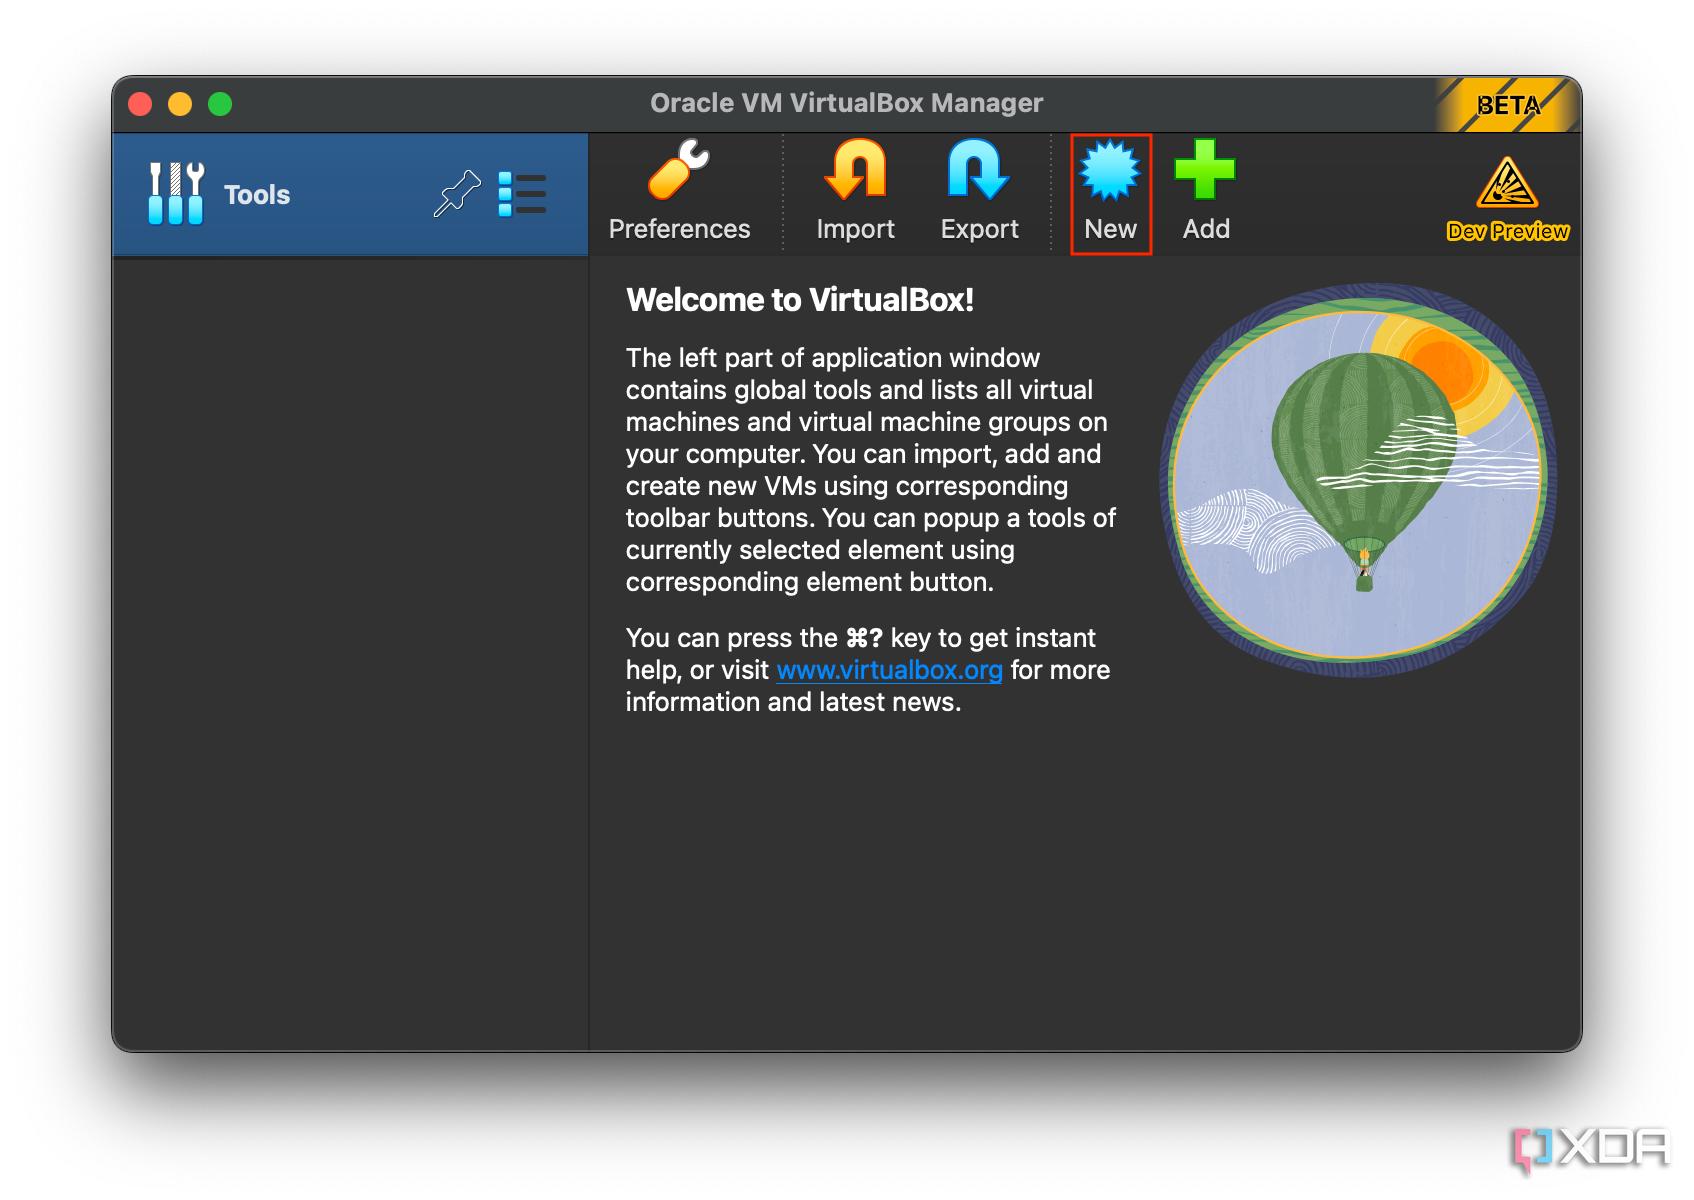
Launch VirtualBox, and click the New button.
-
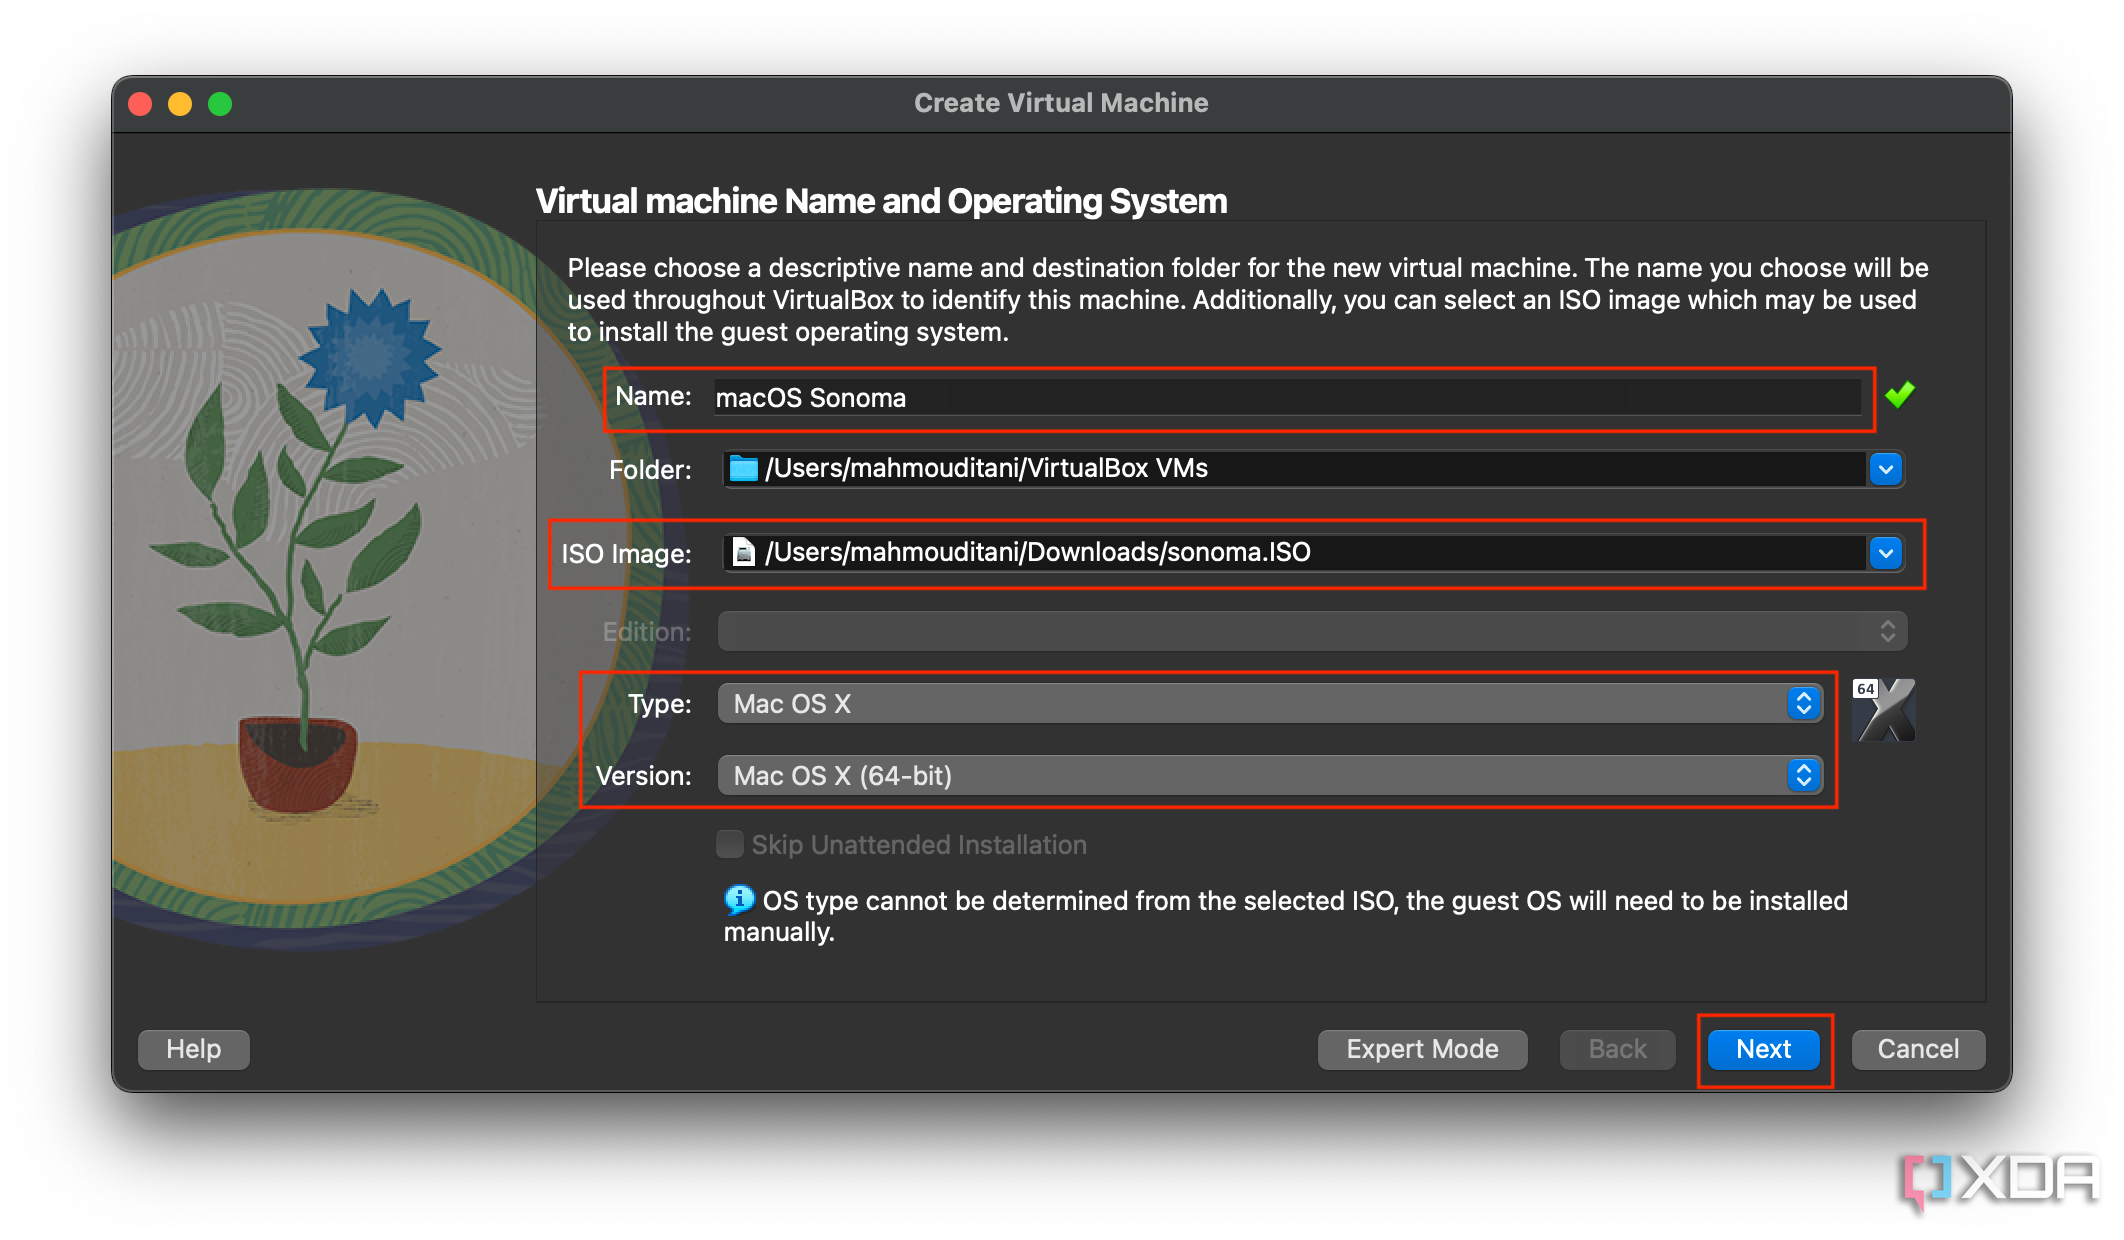
Give your virtual machine a Name. This could be anything you want.
-
In the ISO Image field, navigate to the macOS Sonoma ISO file and select it.
-
Set the Type as Mac OS X and the Version as Mac OS X (64-bit).
-
Click Next once you’ve filled all the required fields.
-
You will now have to choose how much memory your virtual machine can consume and the number of processor cores. macOS needs at least 4GB of RAM and 2 processor cores. If your computer allows it, opt for higher values to make your virtual machine faster. However, this will naturally slow down your original operating system when the virtual machine is running. When done, click Next.

-
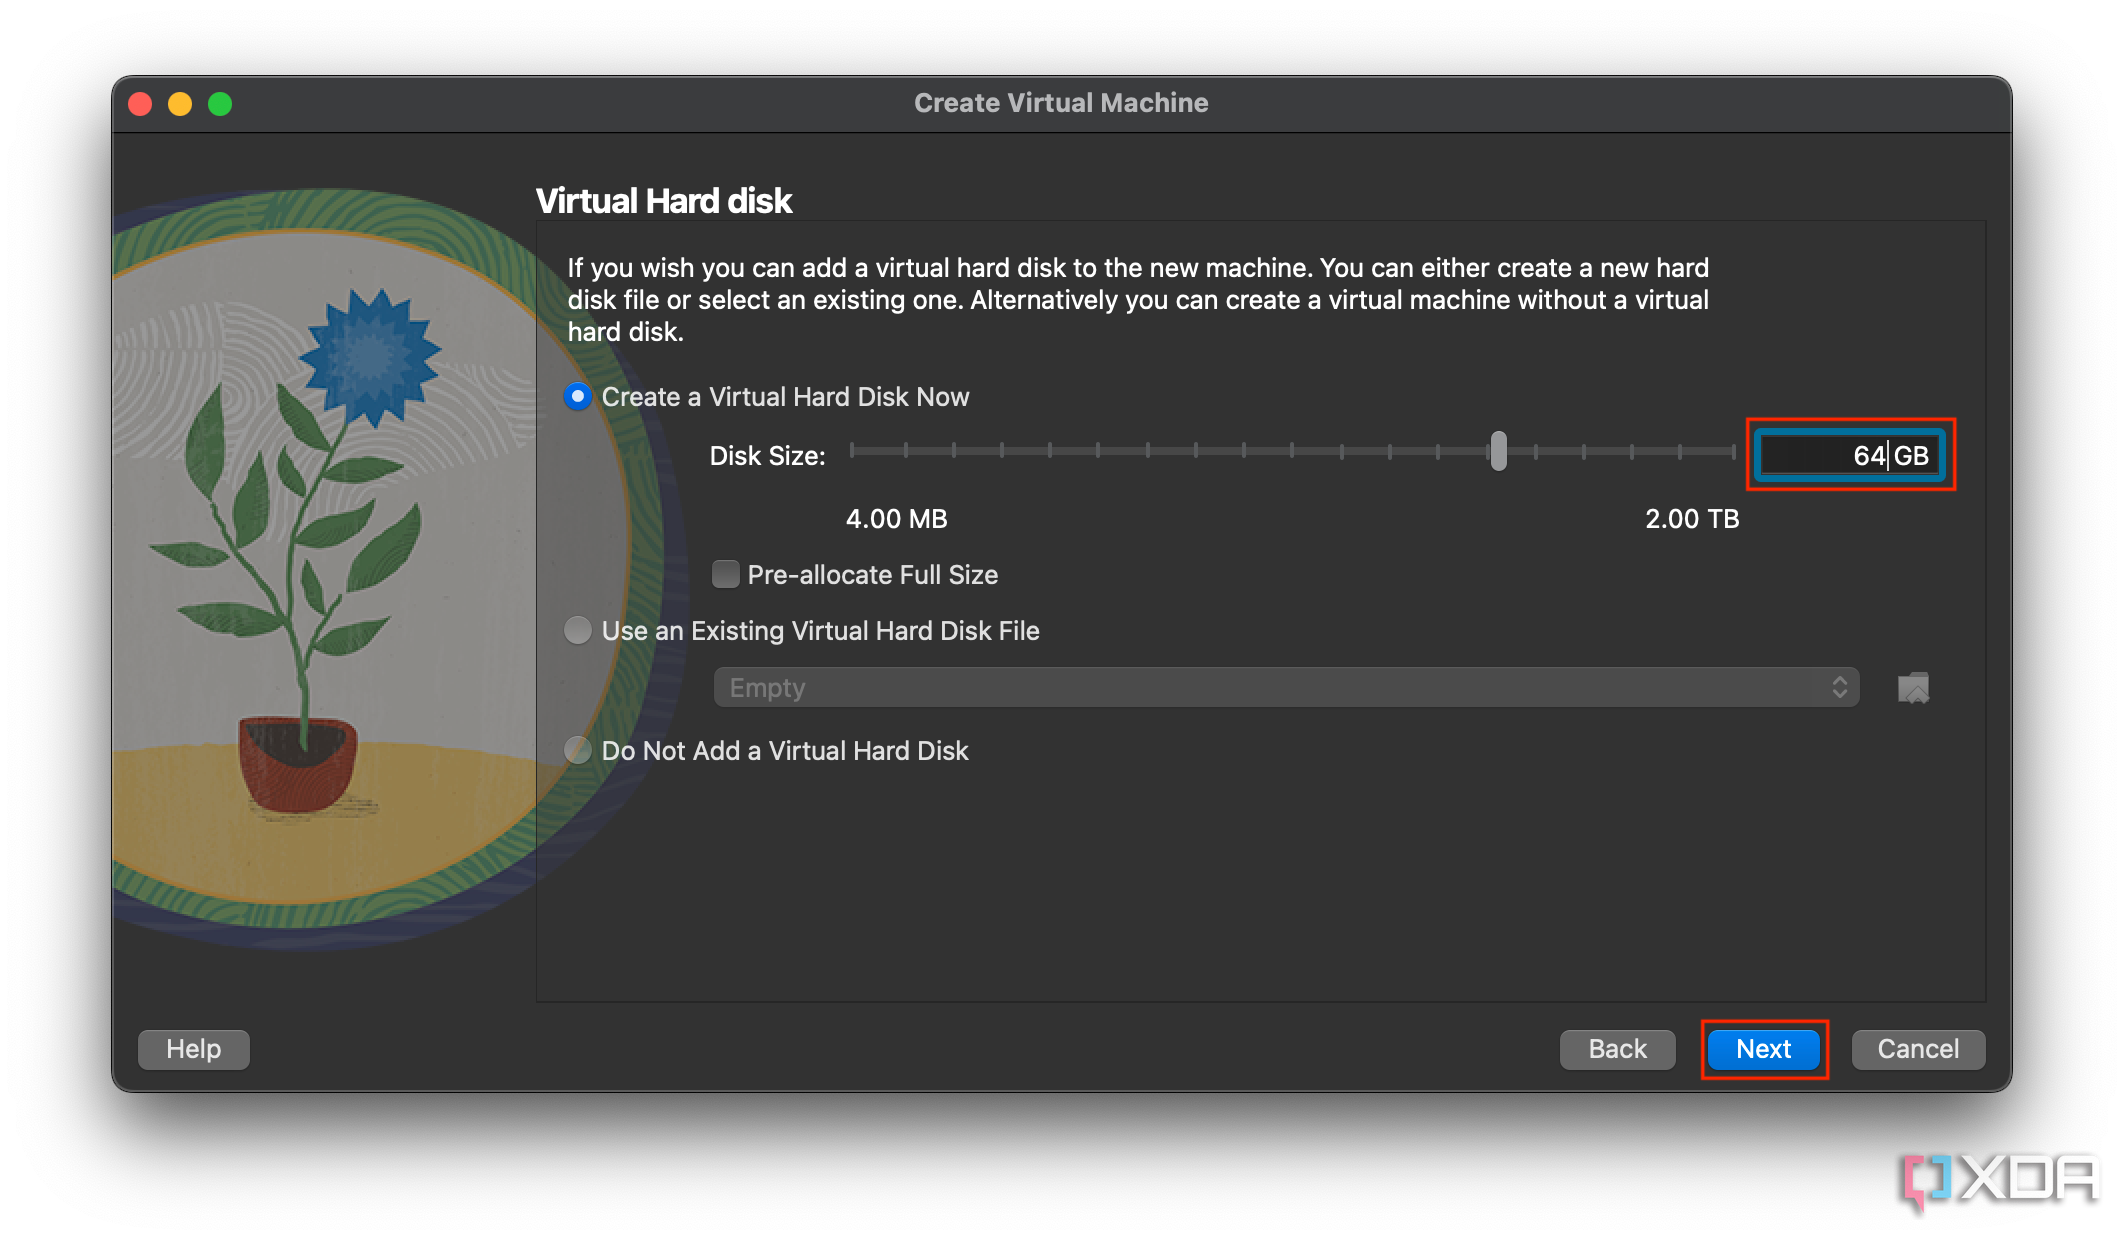
Now, you will similarly have to allocate storage for your virtual machine. It’s recommended to provide it with at least 35GB. If you have sufficient space, aim higher. When done, click Next.
-
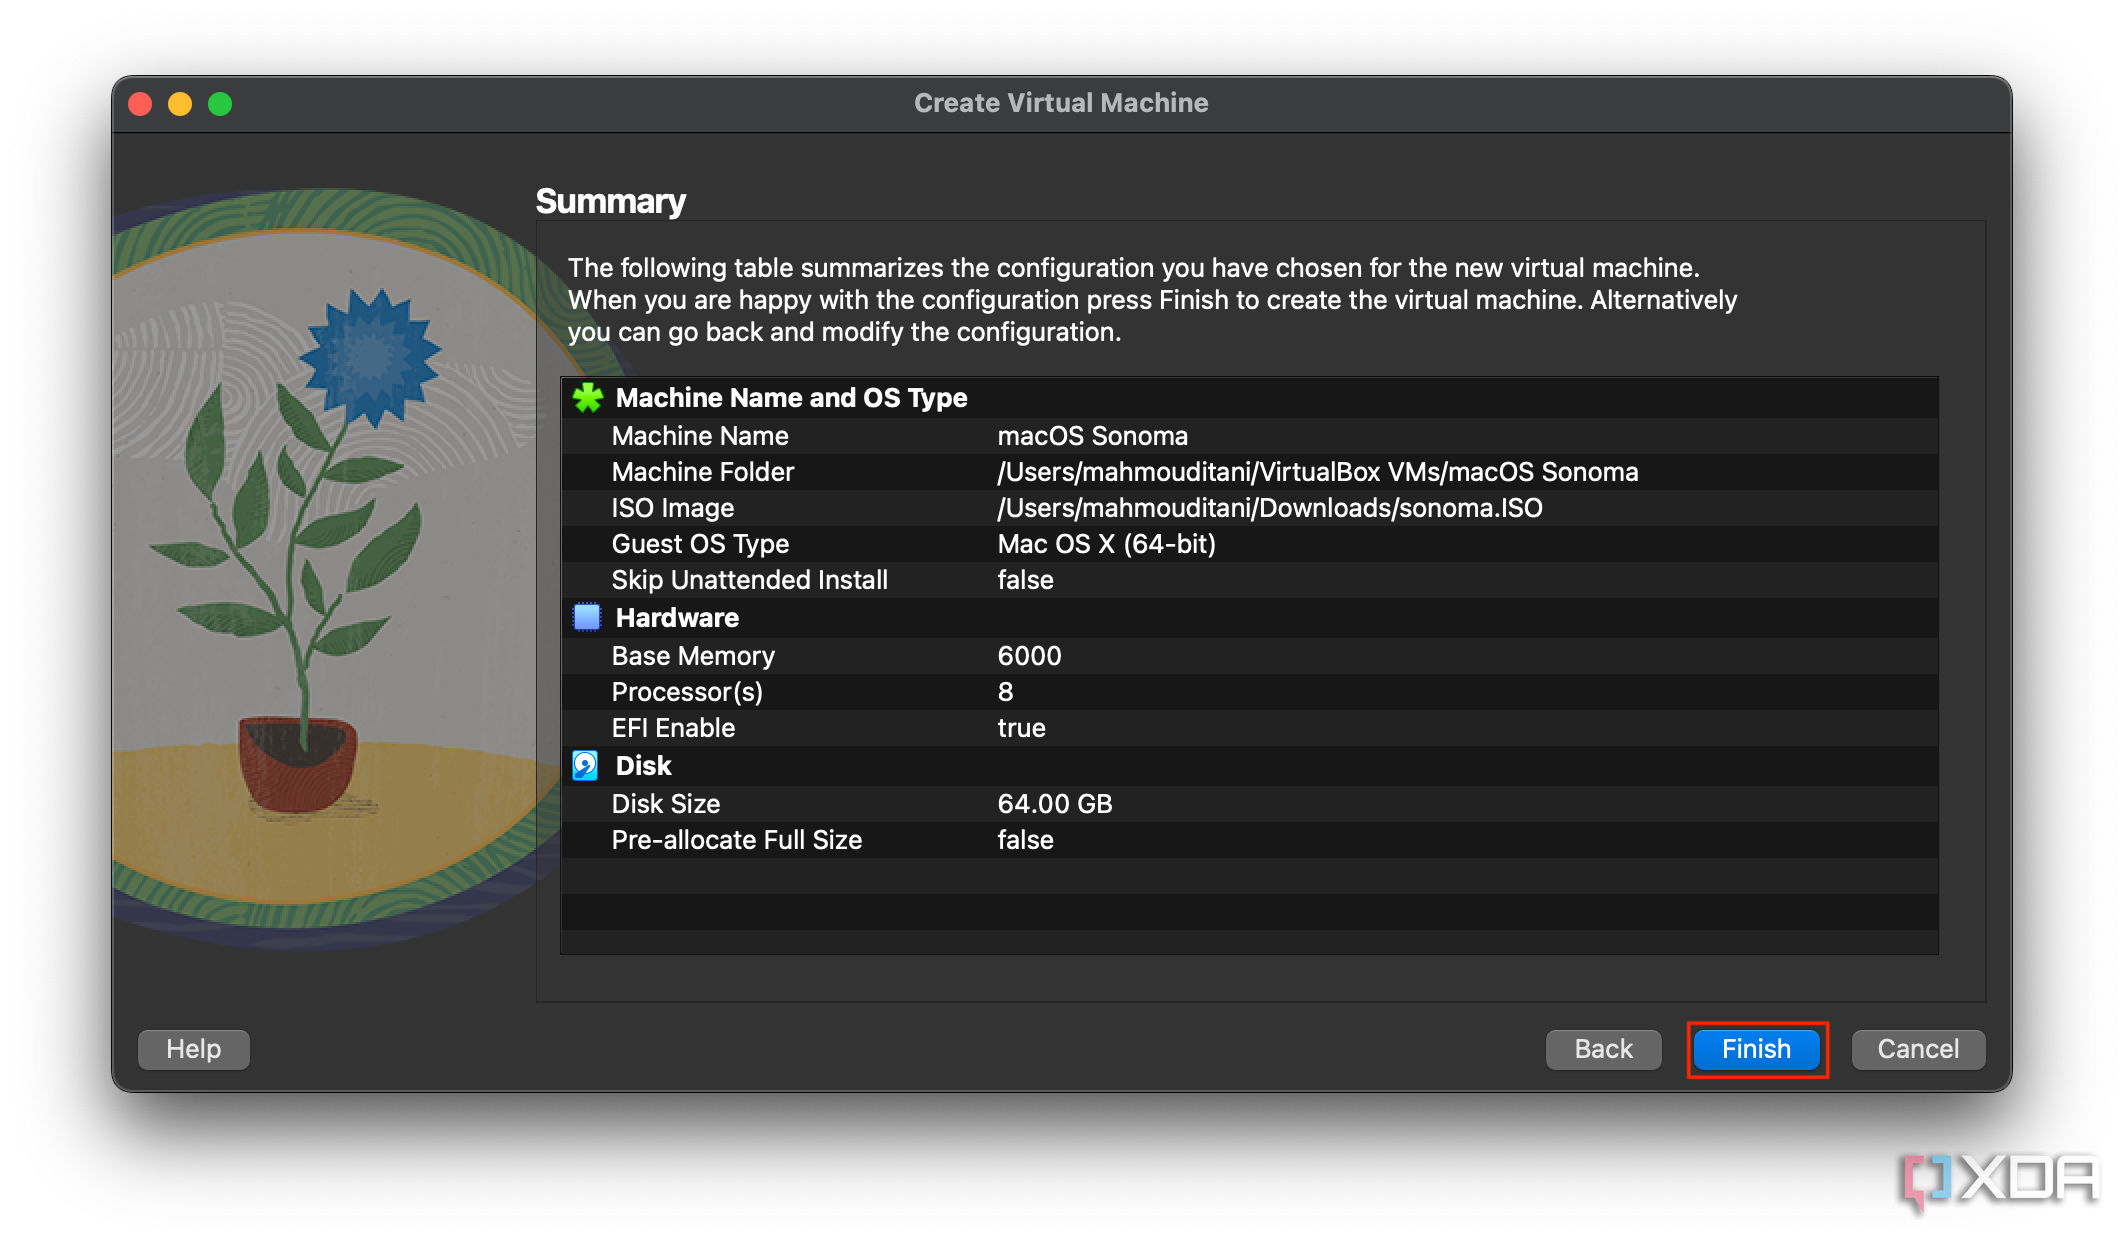
Tap Finish.
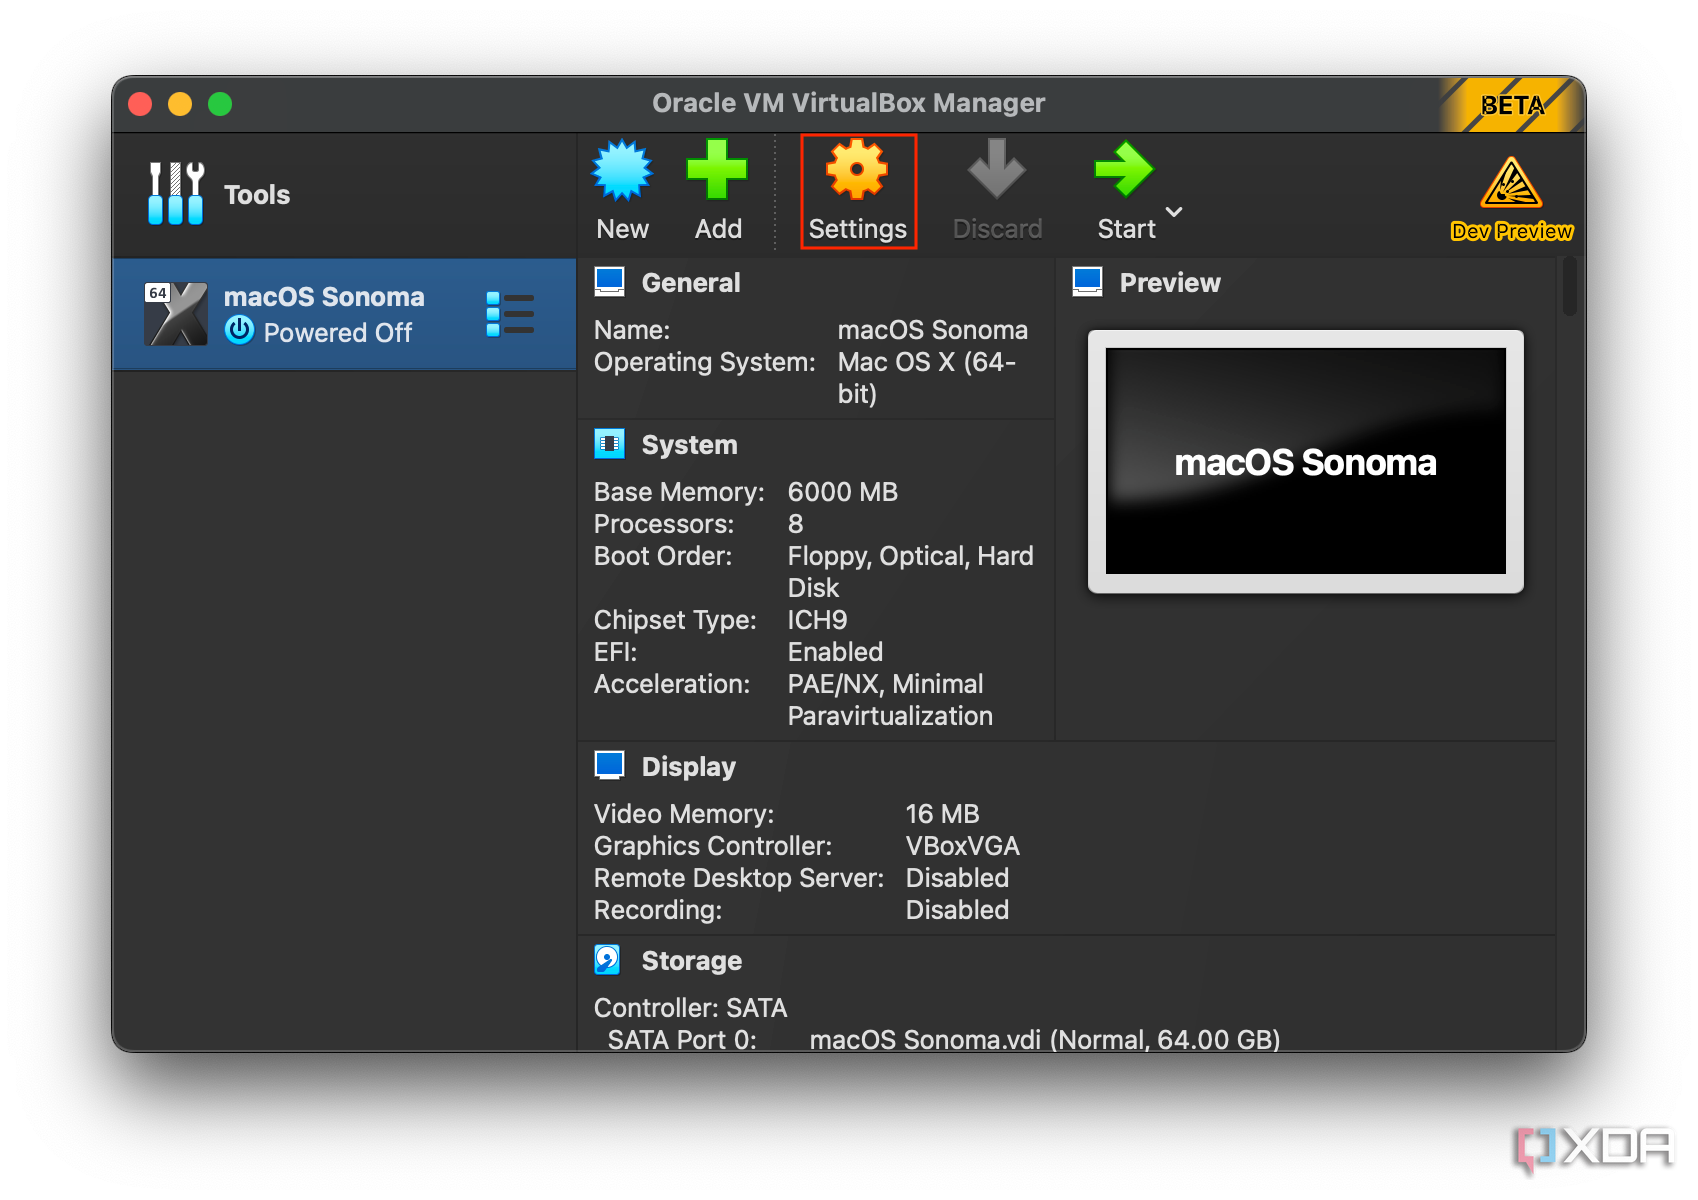
- Hit the Settings button.
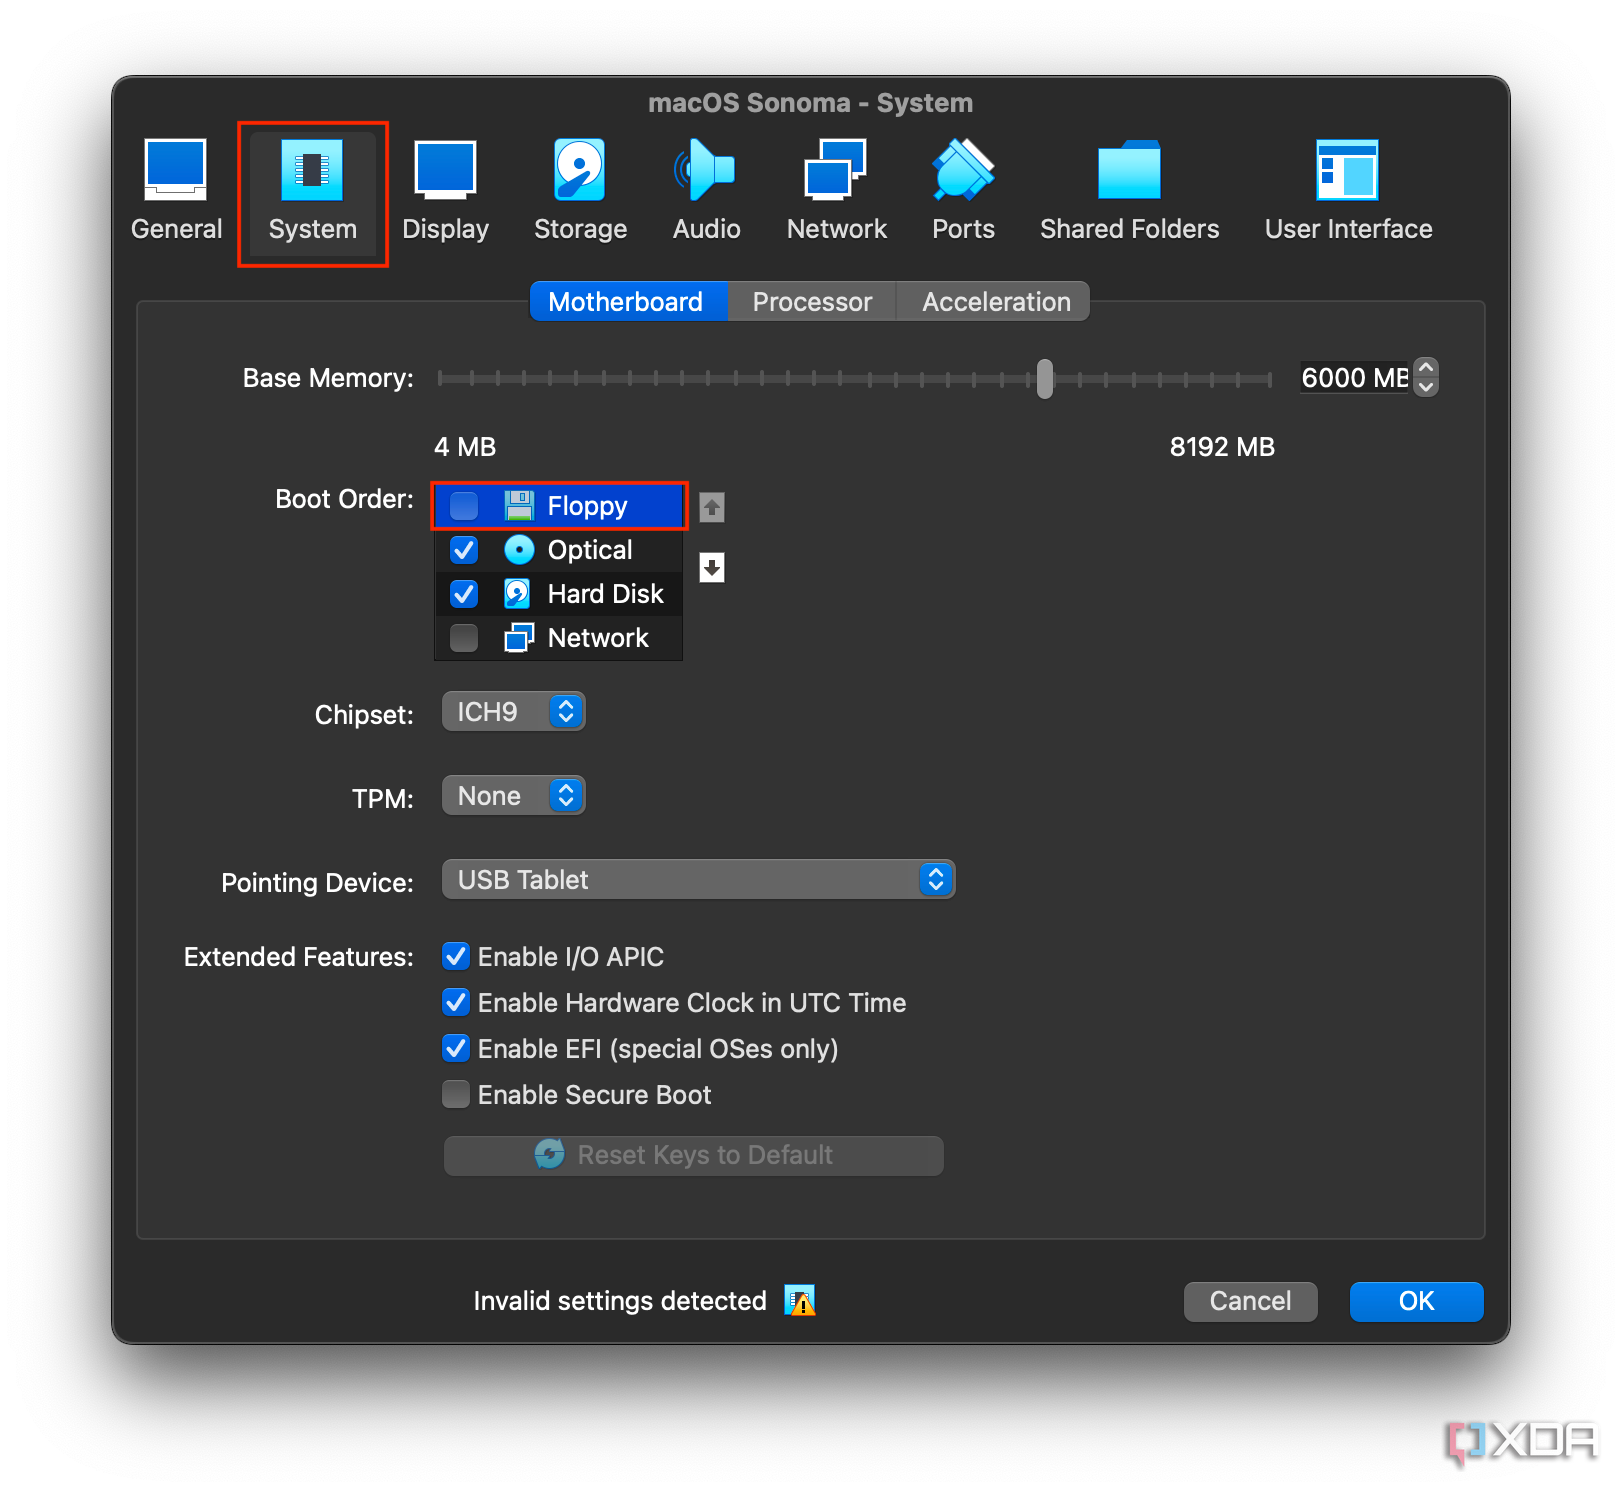
- Go to the System section and uncheck the Floppy box.
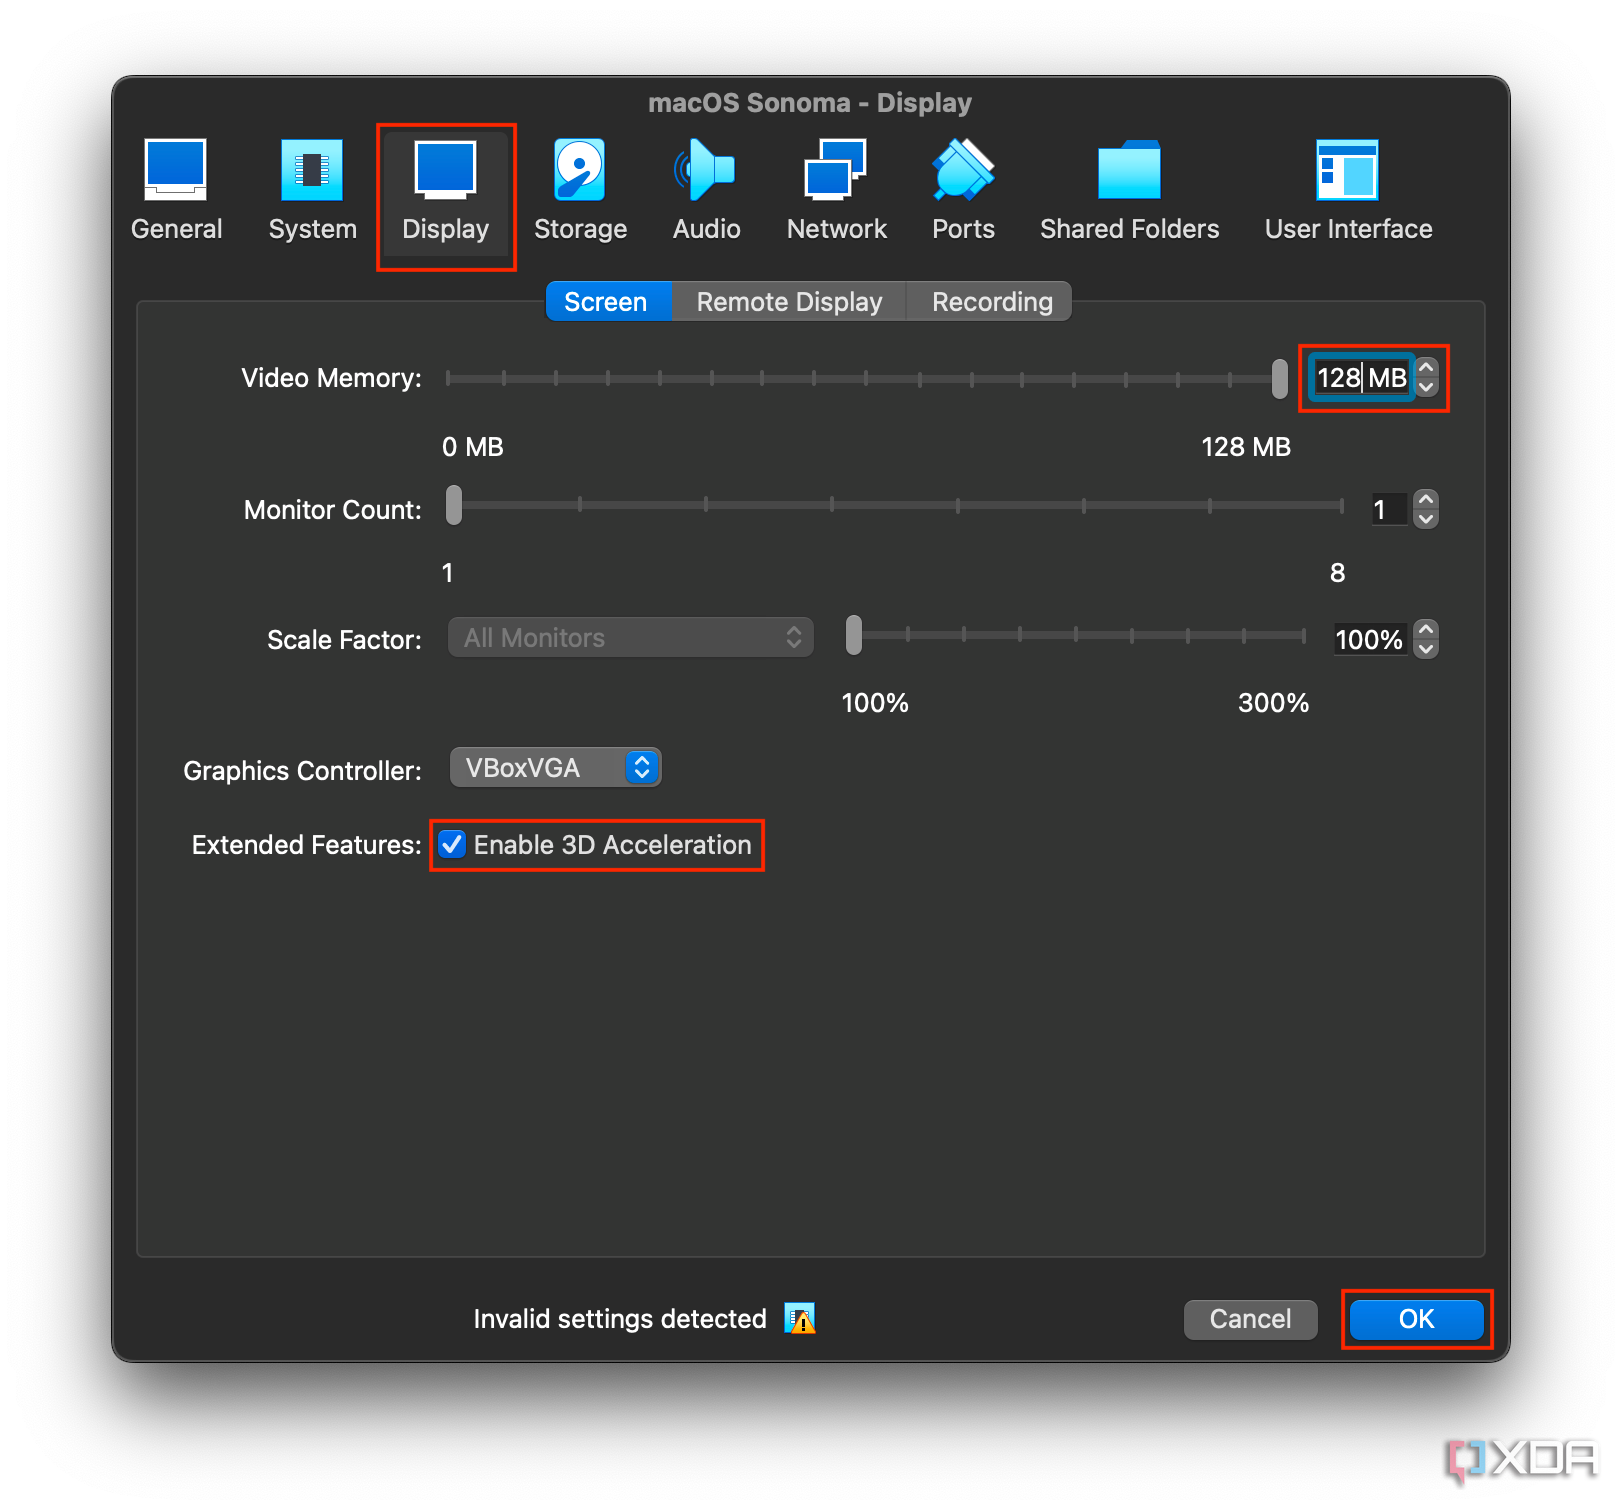
- Go to the Display section, set the Video Memory to 128MB, and toggle Enable 3D Acceleration, if available.
- Hit OK.
-
Now, quit VirtualBox completely.
-
If you’re on Windows, you will need to run the following commands through PowerShell:
```
cd "C:\Program Files\Oracle\VirtualBox\"VBoxManage.exe modifyvm "Virtual Machine Name" --cpuidset 00000001 000106e5 00100800 0098e3fd bfebfbffVBoxManage setextradata "Virtual Machine Name" "VBoxInternal/Devices/efi/0/Config/DmiSystemProduct" "iMac11,3"VBoxManage setextradata "Virtual Machine Name" "VBoxInternal/Devices/efi/0/Config/DmiSystemVersion" "1.0"VBoxManage setextradata "Virtual Machine Name" "VBoxInternal/Devices/efi/0/Config/DmiBoardProduct" "Iloveapple"VBoxManage setextradata "Virtual Machine Name" "VBoxInternal/Devices/smc/0/Config/DeviceKey" "ourhardworkbythesewordsguardedpleasedontsteal(c)AppleComputerInc"VBoxManage setextradata "Virtual Machine Name" "VBoxInternal/Devices/smc/0/Config/GetKeyFromRealSMC" 1
```
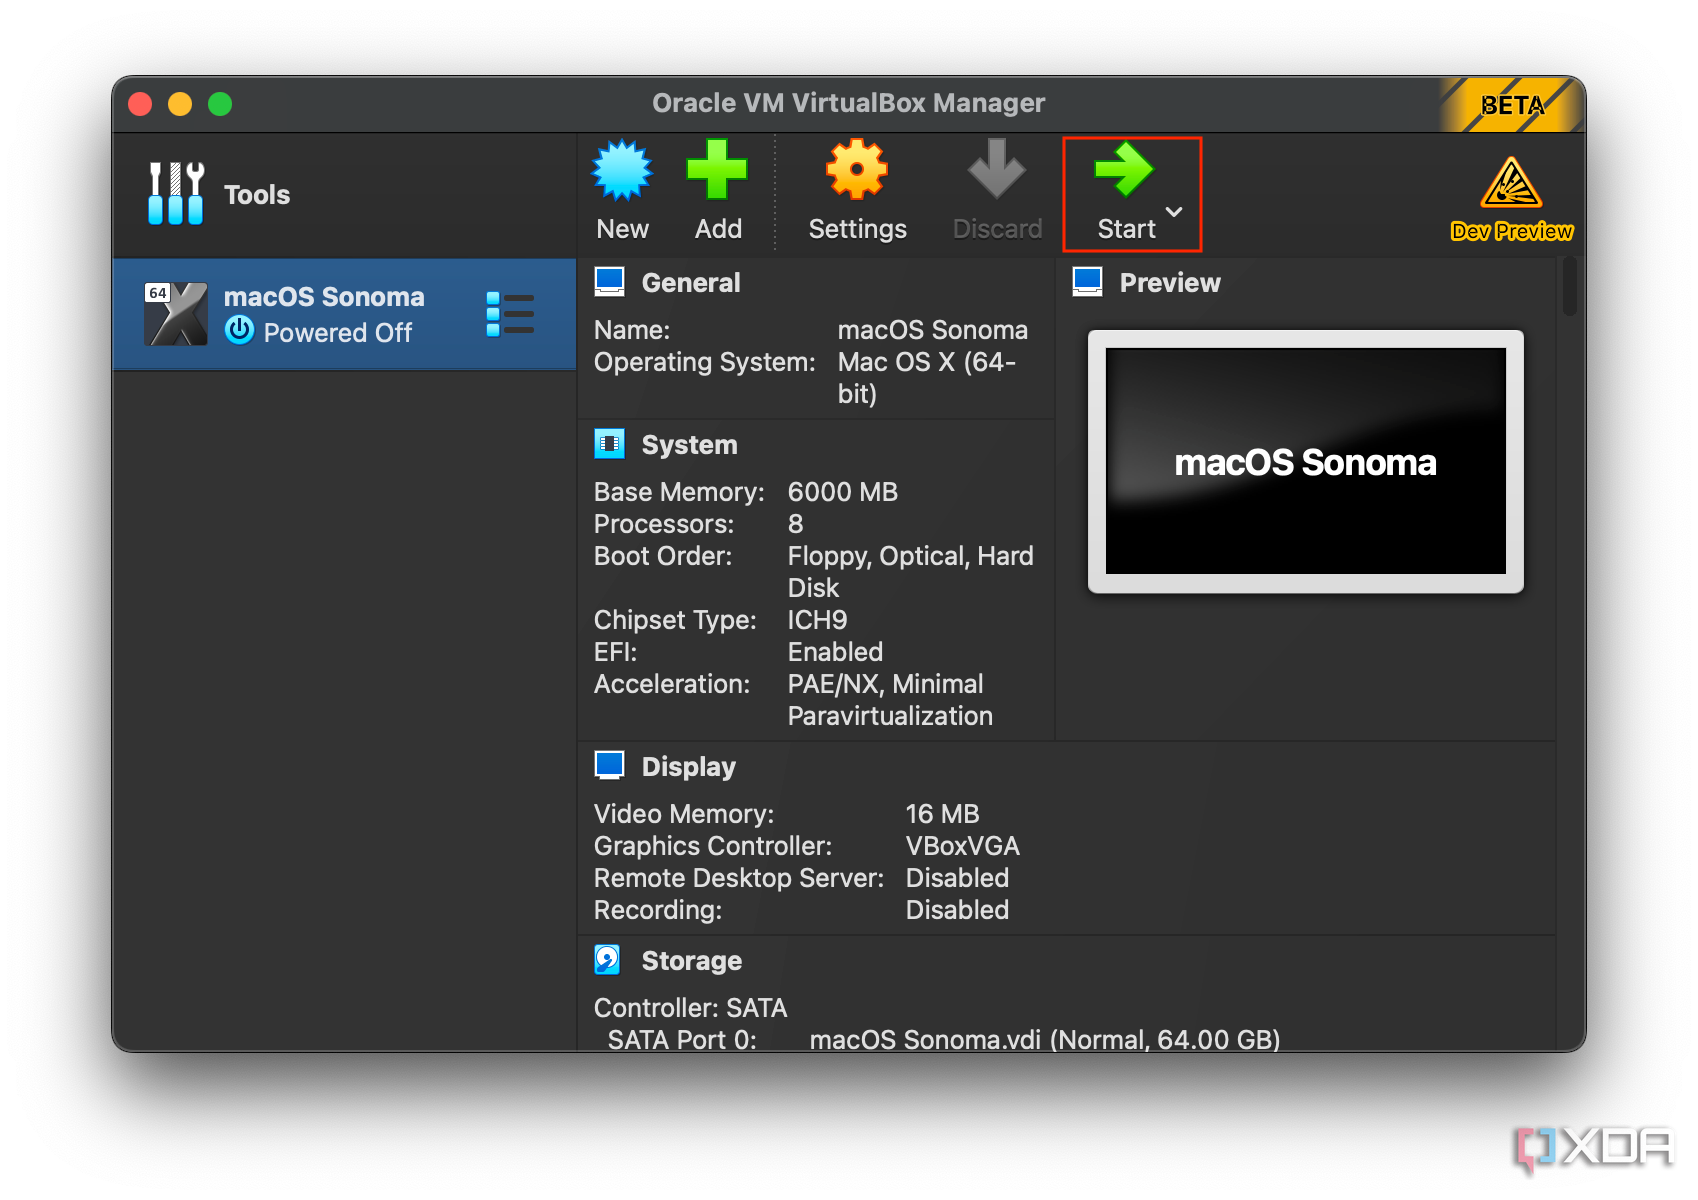
17. If you’re on Linux, you will have to add sudo to the beginning of the commands above. 18. Launch VirtualBox again, and hit the Start button to launch macOS Sonoma in the sandbox.
19. You should now see the language selection screen, where the macOS setup begins. 20. That’s it! Go through the regular macOS setup screens and start using the operating system as you would normally do.
Installing macOS in VirtualBox can be useful
As our guide reflects, you can install macOS in a virtual machine on Mac, Windows, and Linux computers. While the process may seem complex to some users, you only have to go through it once. You then get to launch VirtualBox and use macOS directly whenever you need to. Do keep in mind, however, that some macOS features may not work as expected (or at all) in VirtualBox.
Running macOS in VirtualBox is handy when you need to use or test Mac-exclusive apps on your Windows or Linux machine. It’s also a solid way to try out random functionalities and dig into the system, without worrying about messing things up. No matter what you corrupt in the virtual machine, the damage should remain limited to the sandbox. In this case, you could always delete the virtual machine and create a new one using the same steps we’ve listed above.
Related
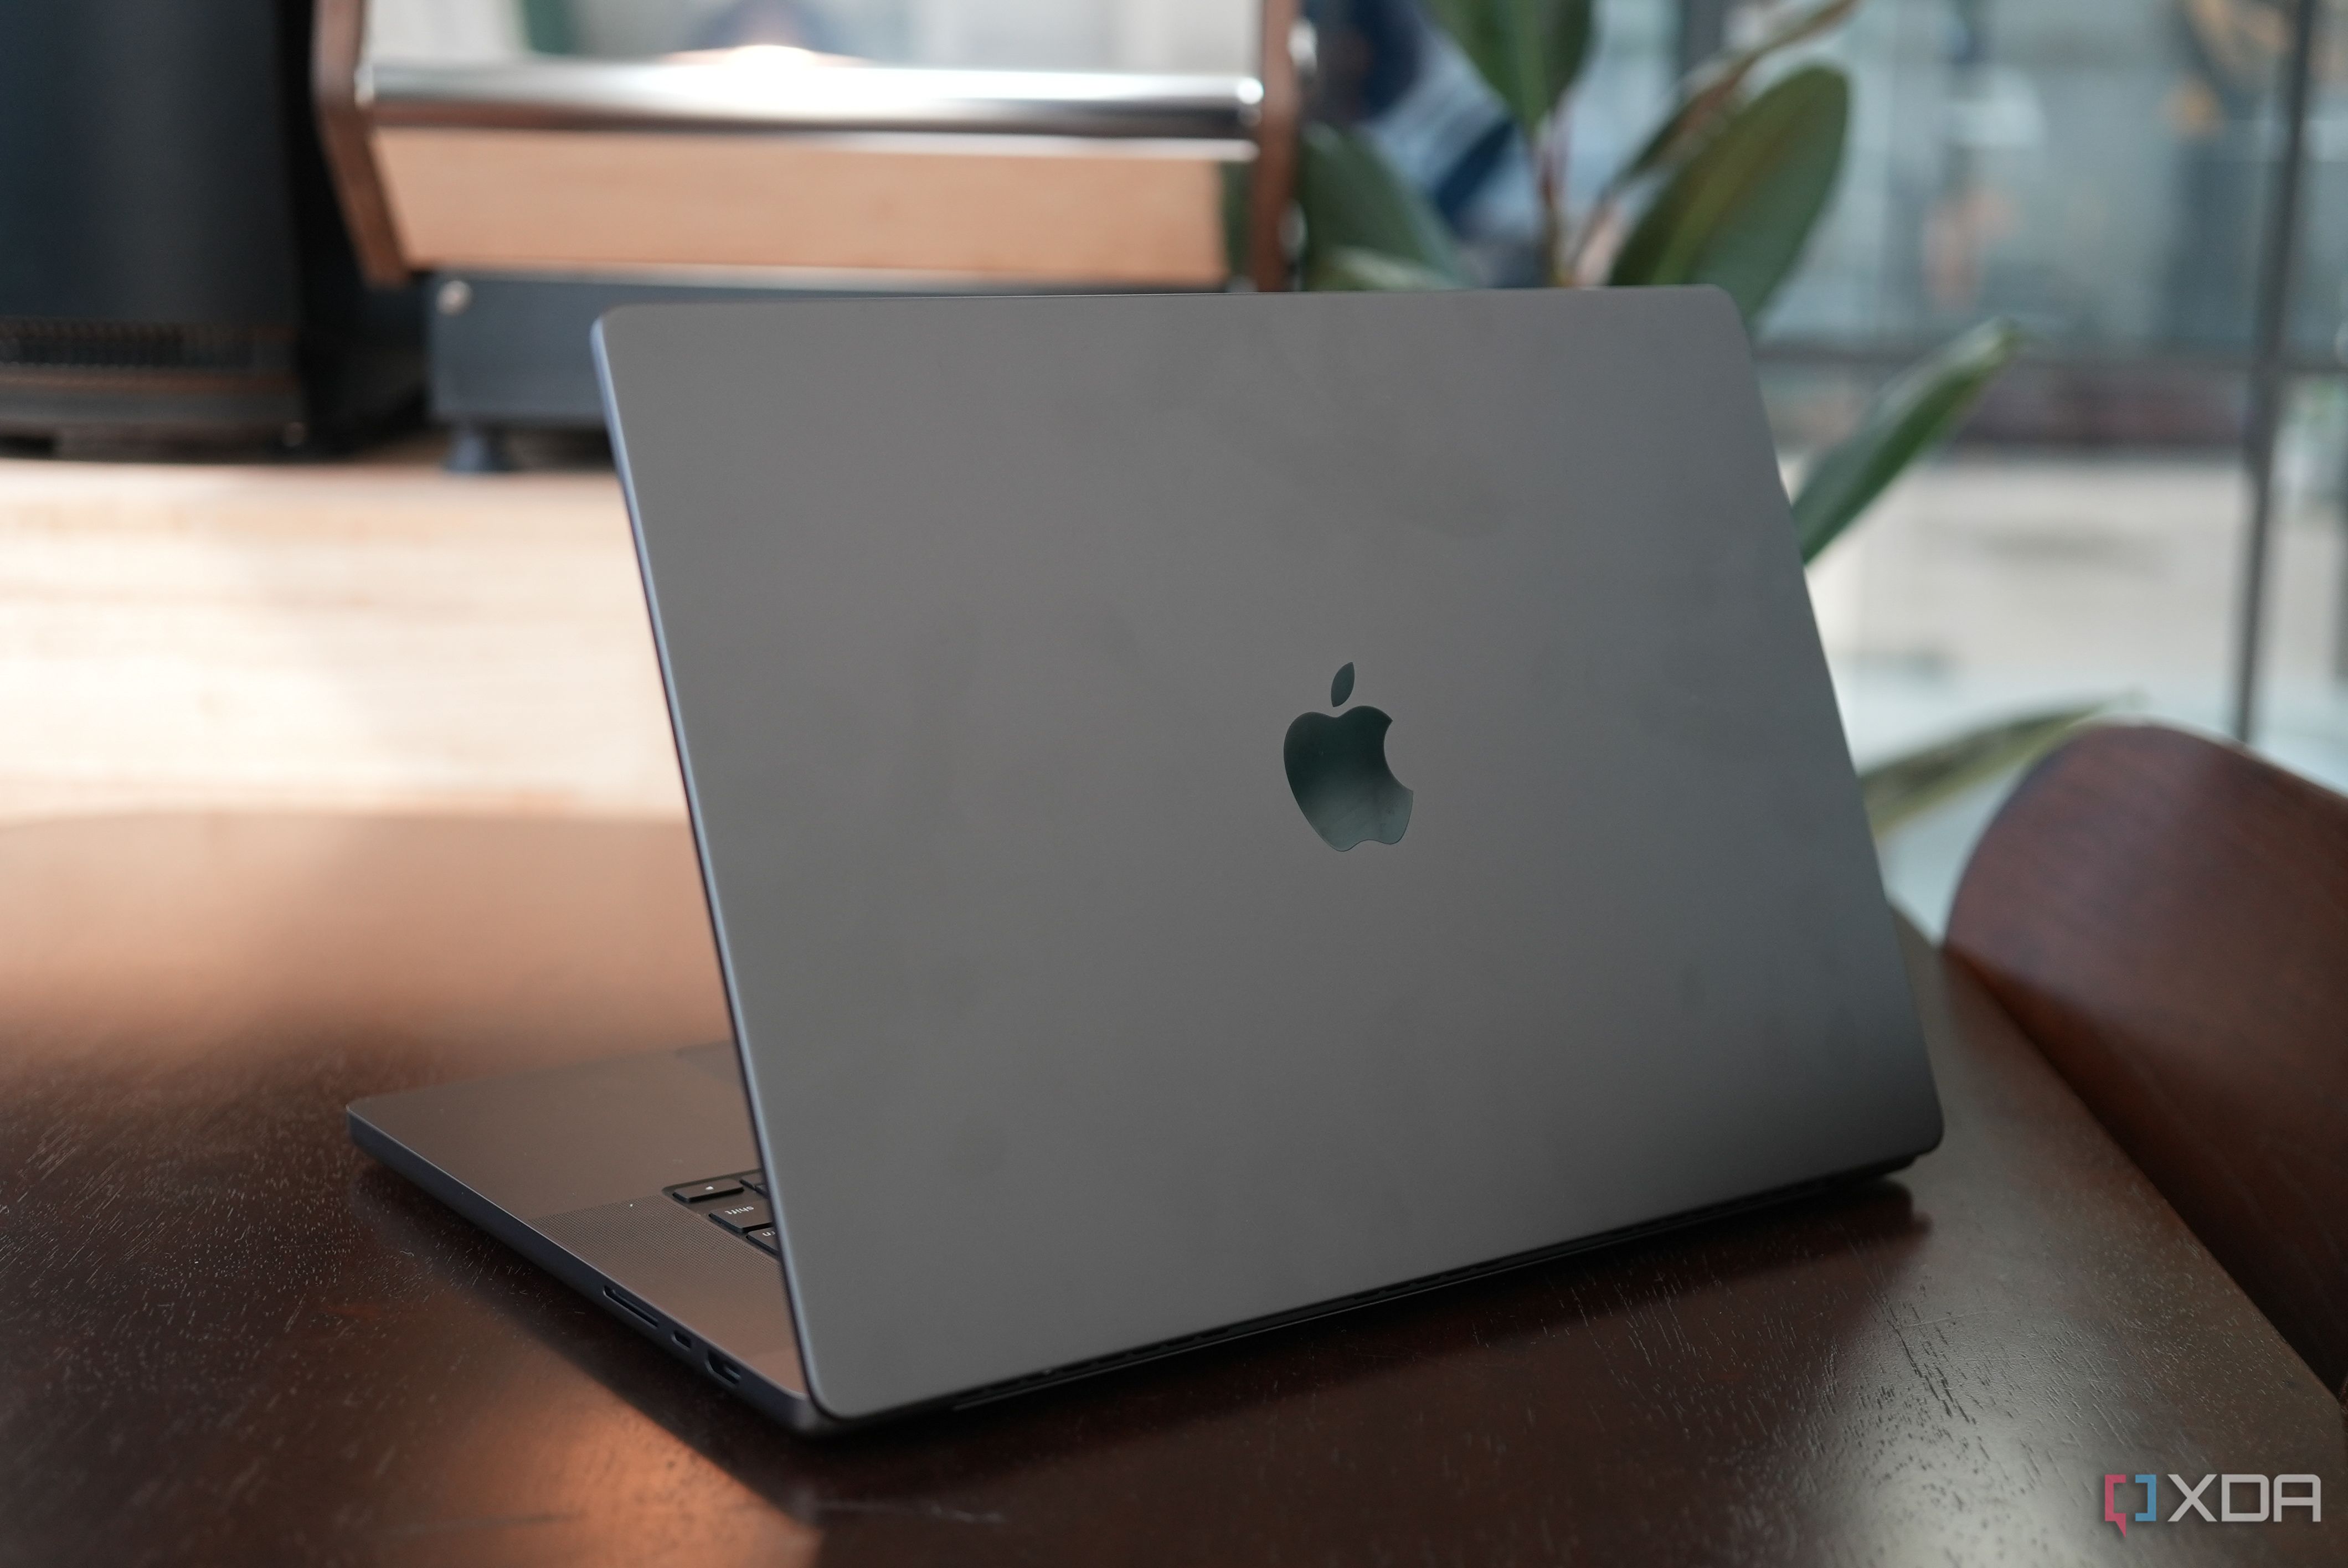
MacBook Pro 16 (M3 Max) review: Apple’s just flexing
The 10-month old M2 Max MacBook Pro is still more powerful than 99% of laptops out there, then Apple released an upgrade with more graphical prowess
- Источник: www.xda-developers.com
- _Мета слова: _